New article
Recently updated
Using and managing the task outbox

Who is this article for?
Users who want to learn to use and manage the task outbox.
Platform admin permissions are required.
This tutorial guides you through managing task outbox within the Ideagen Supply Chain platform.
You will learn how to filter tasks, send reminders, and assign tasks to users.
Managing the task outbox
Log into the system.
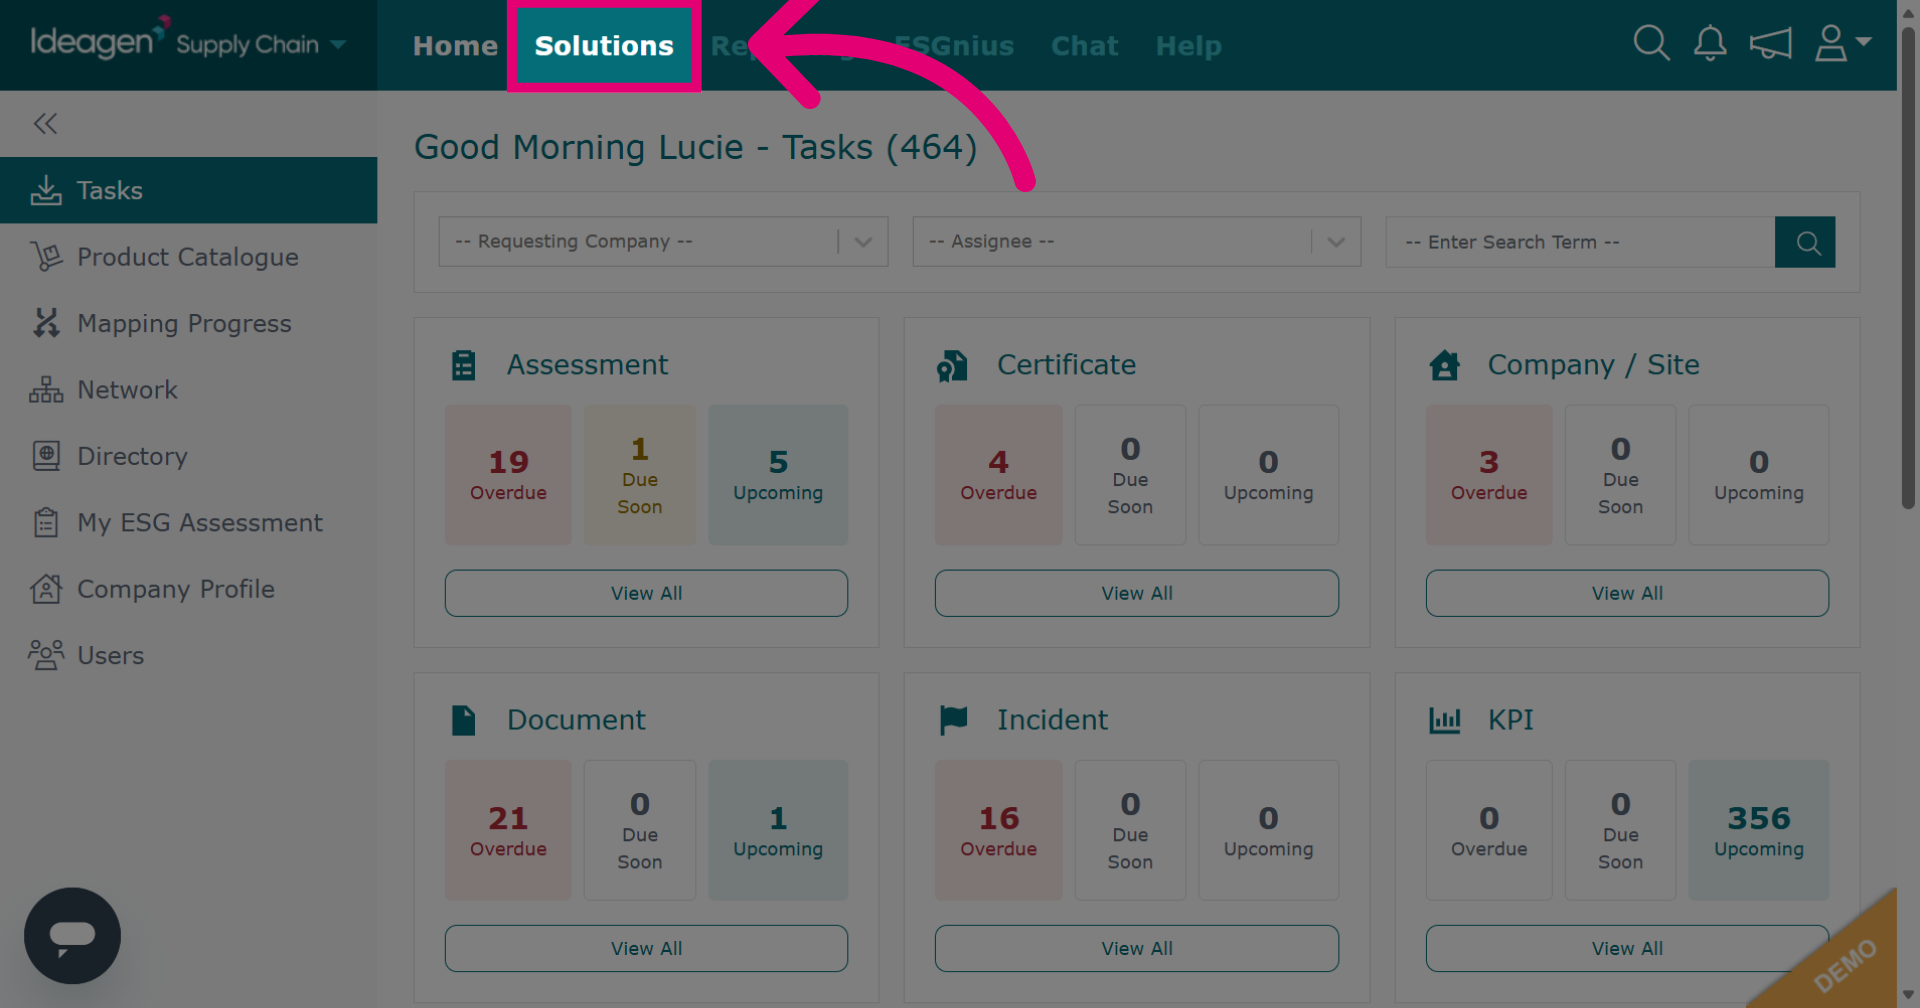
Click Solutions to open the main module menu.
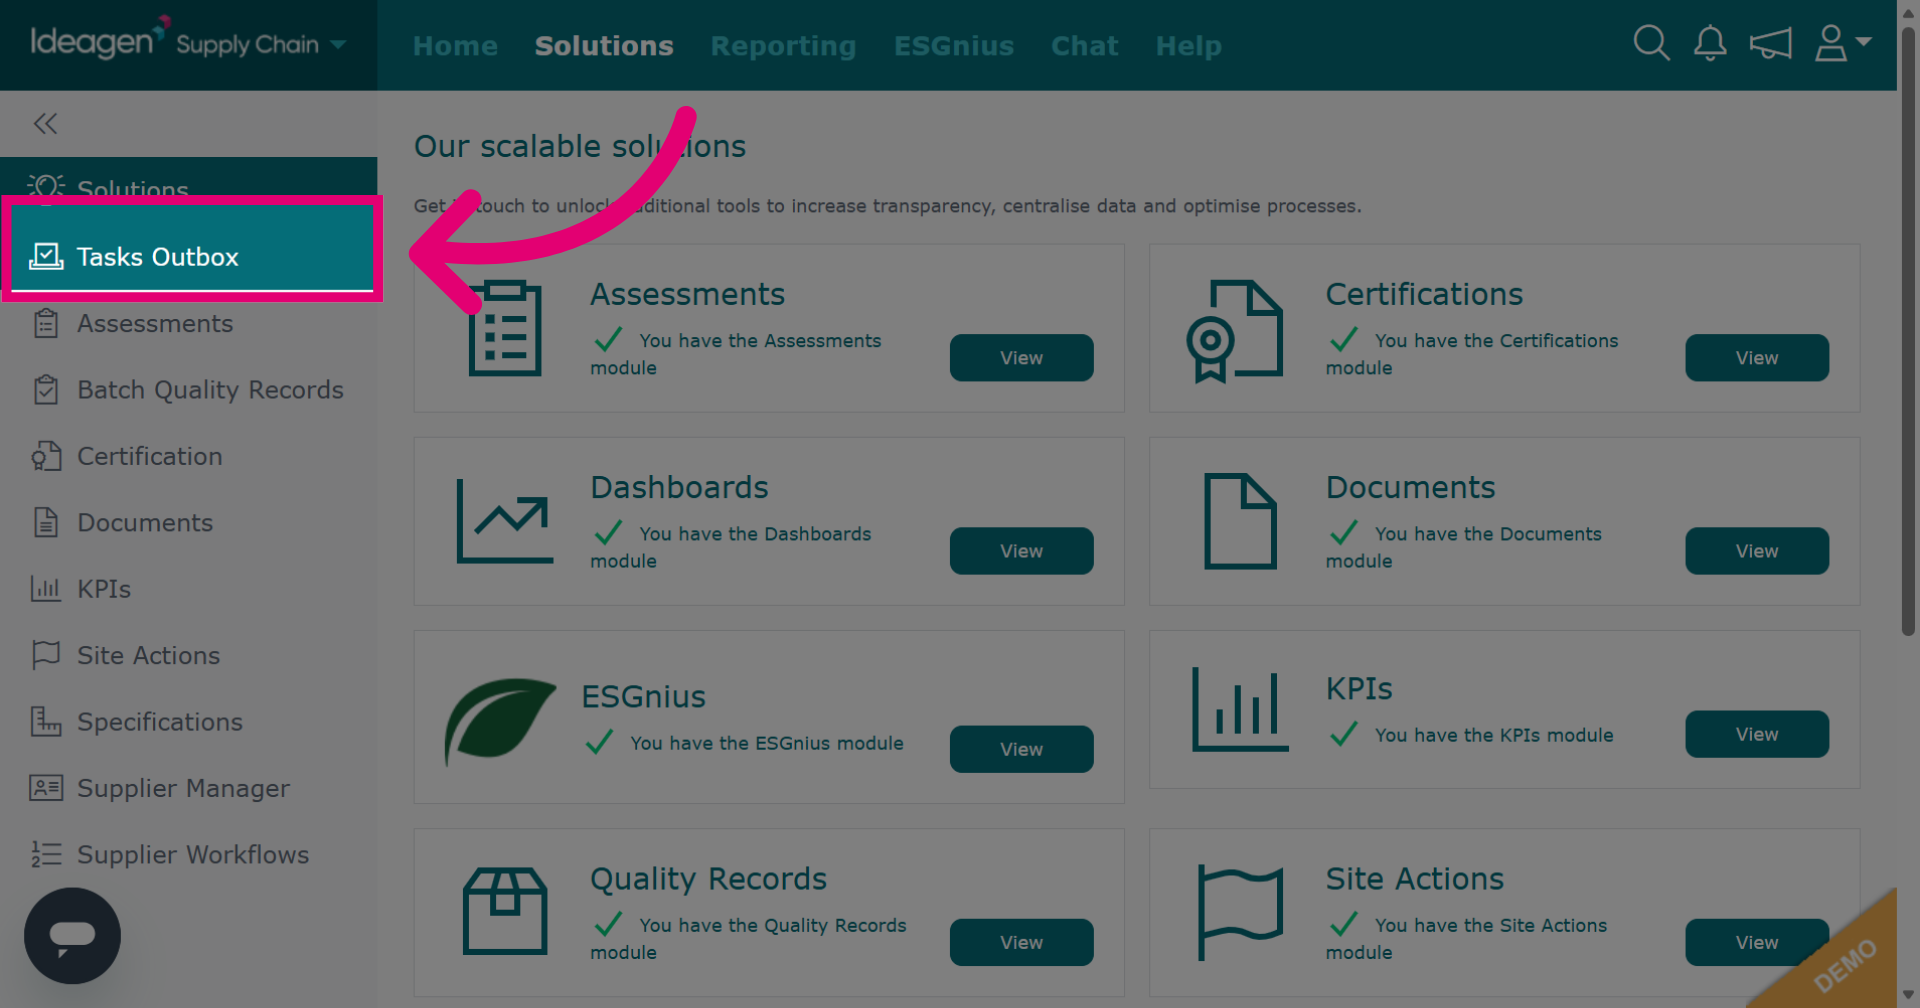
Click Tasks Outbox to view all task requests sent from your company.
You will then be shown your task outbox.
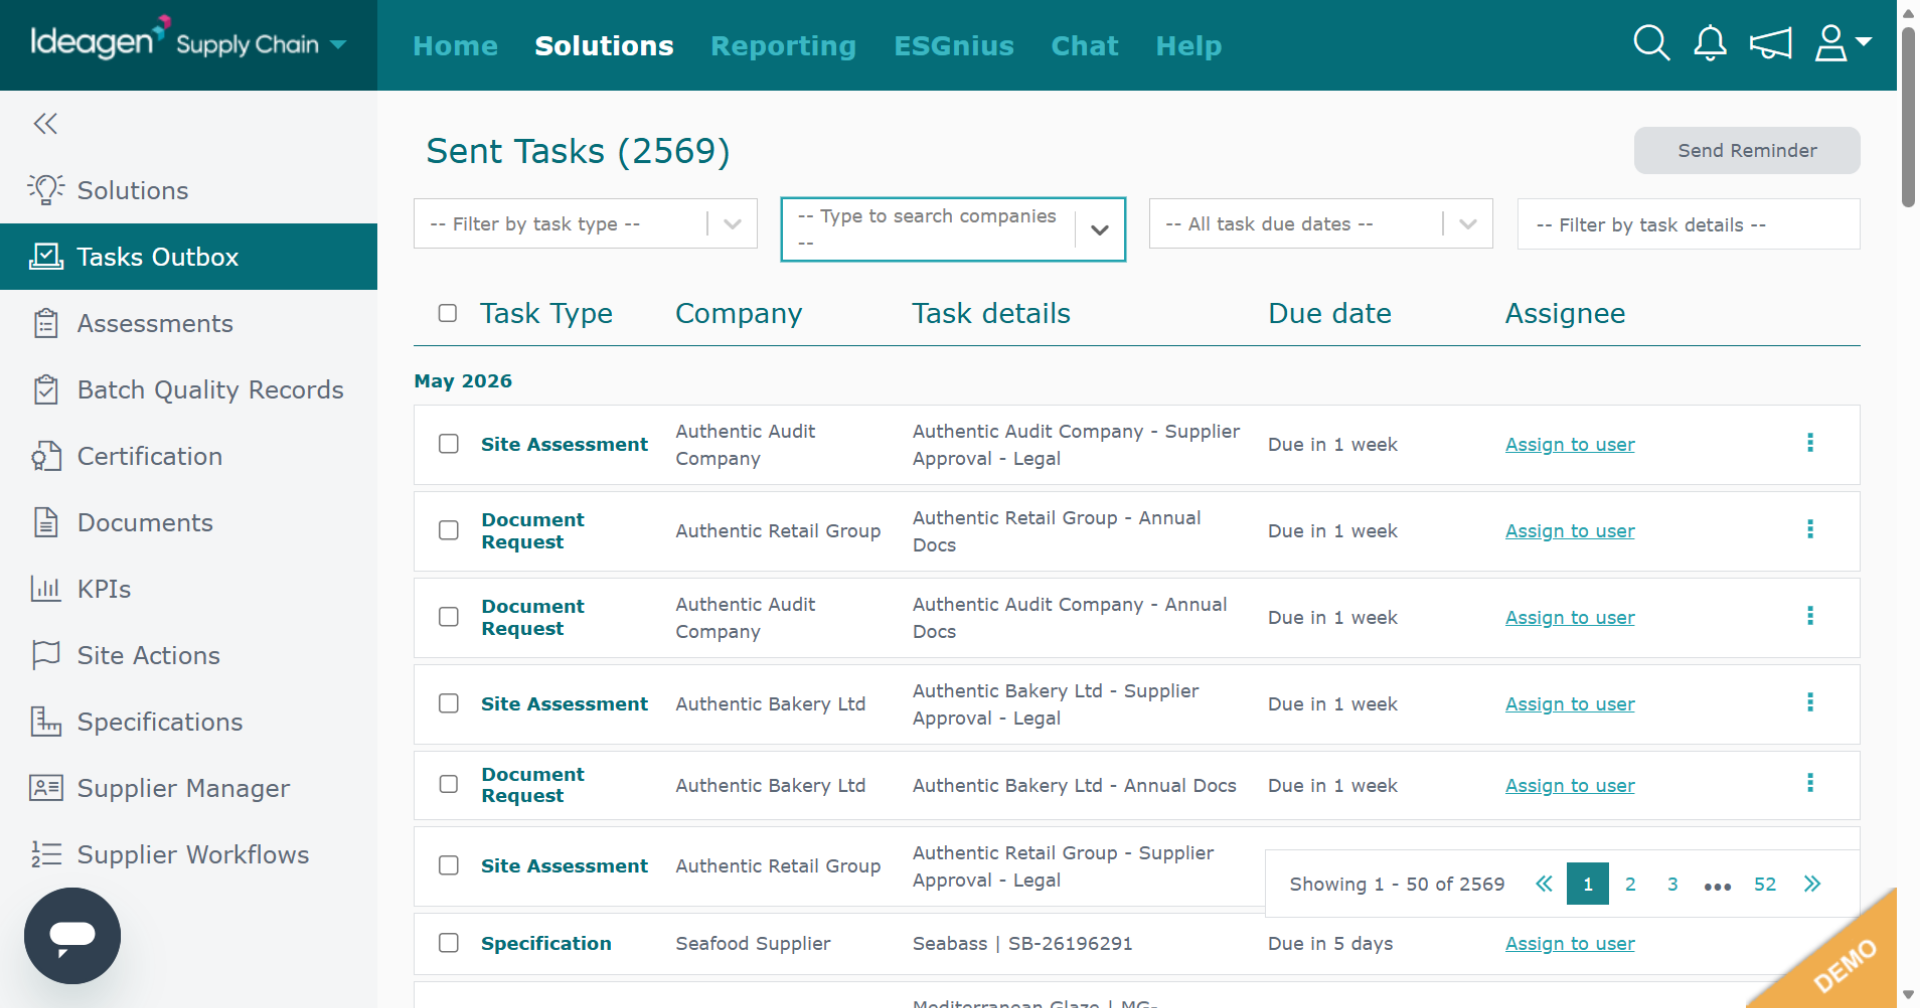
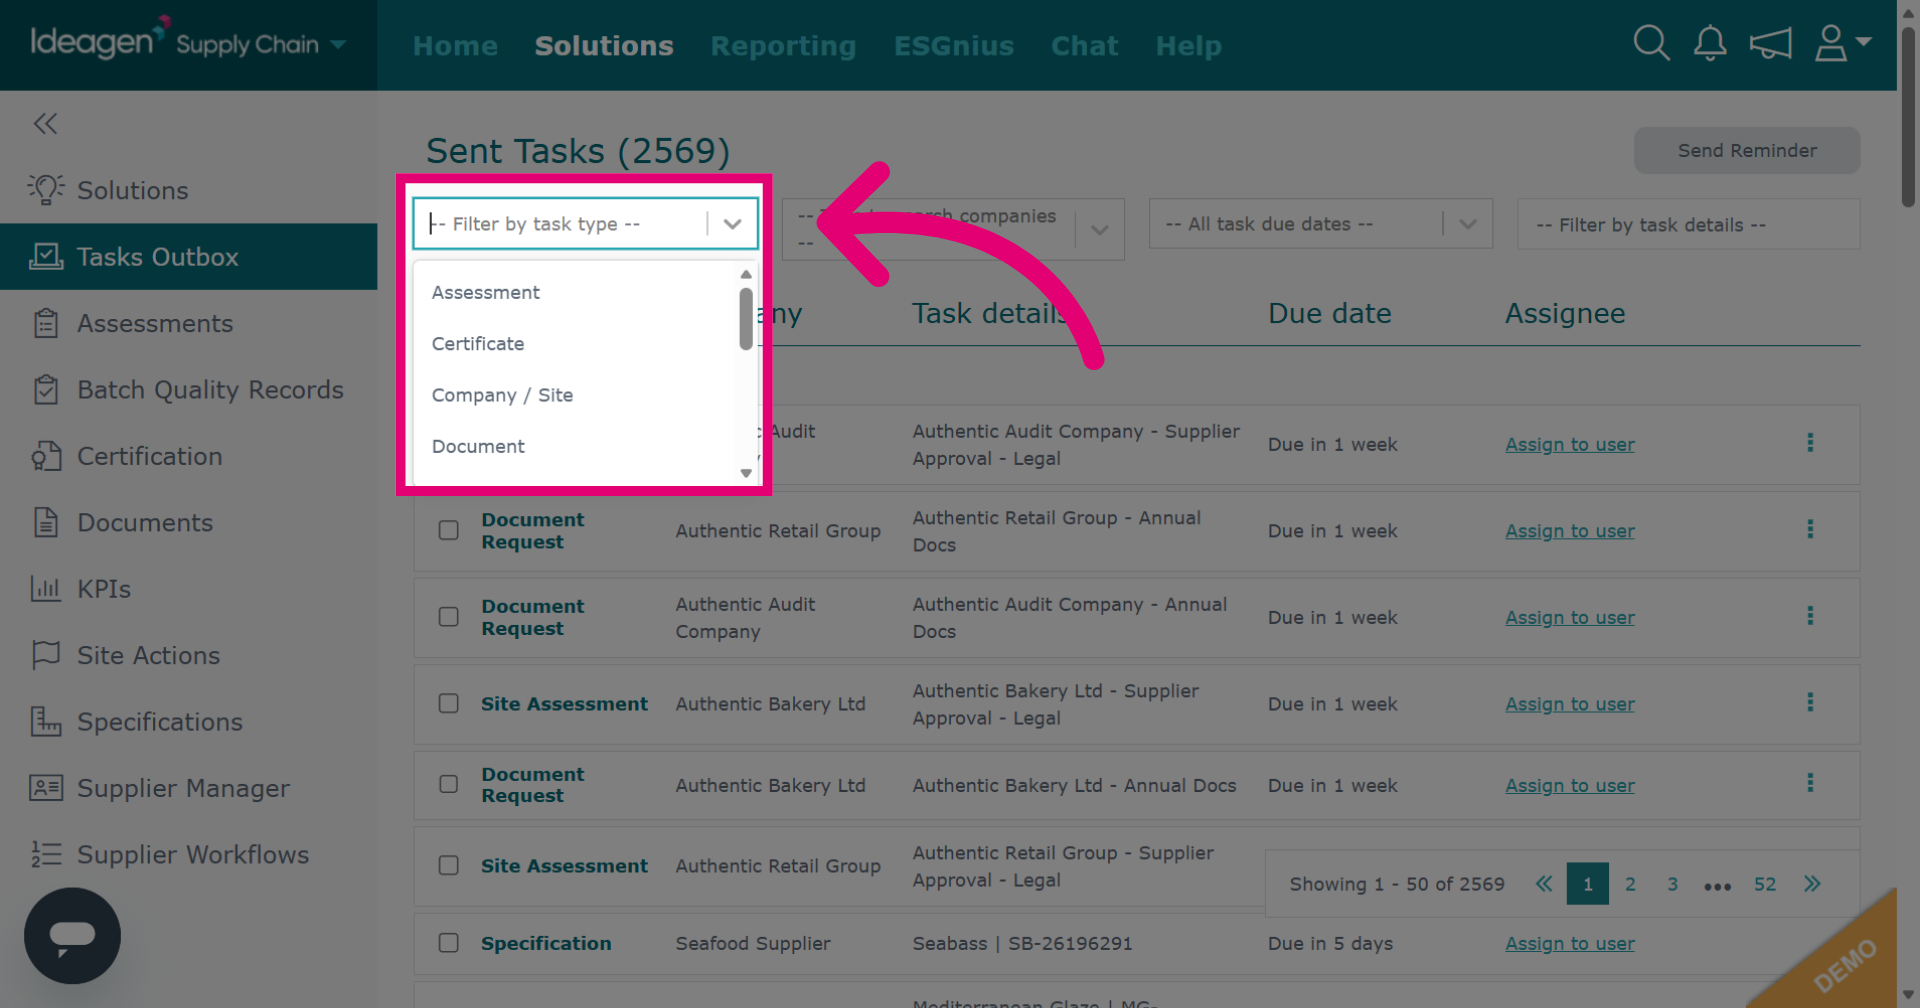
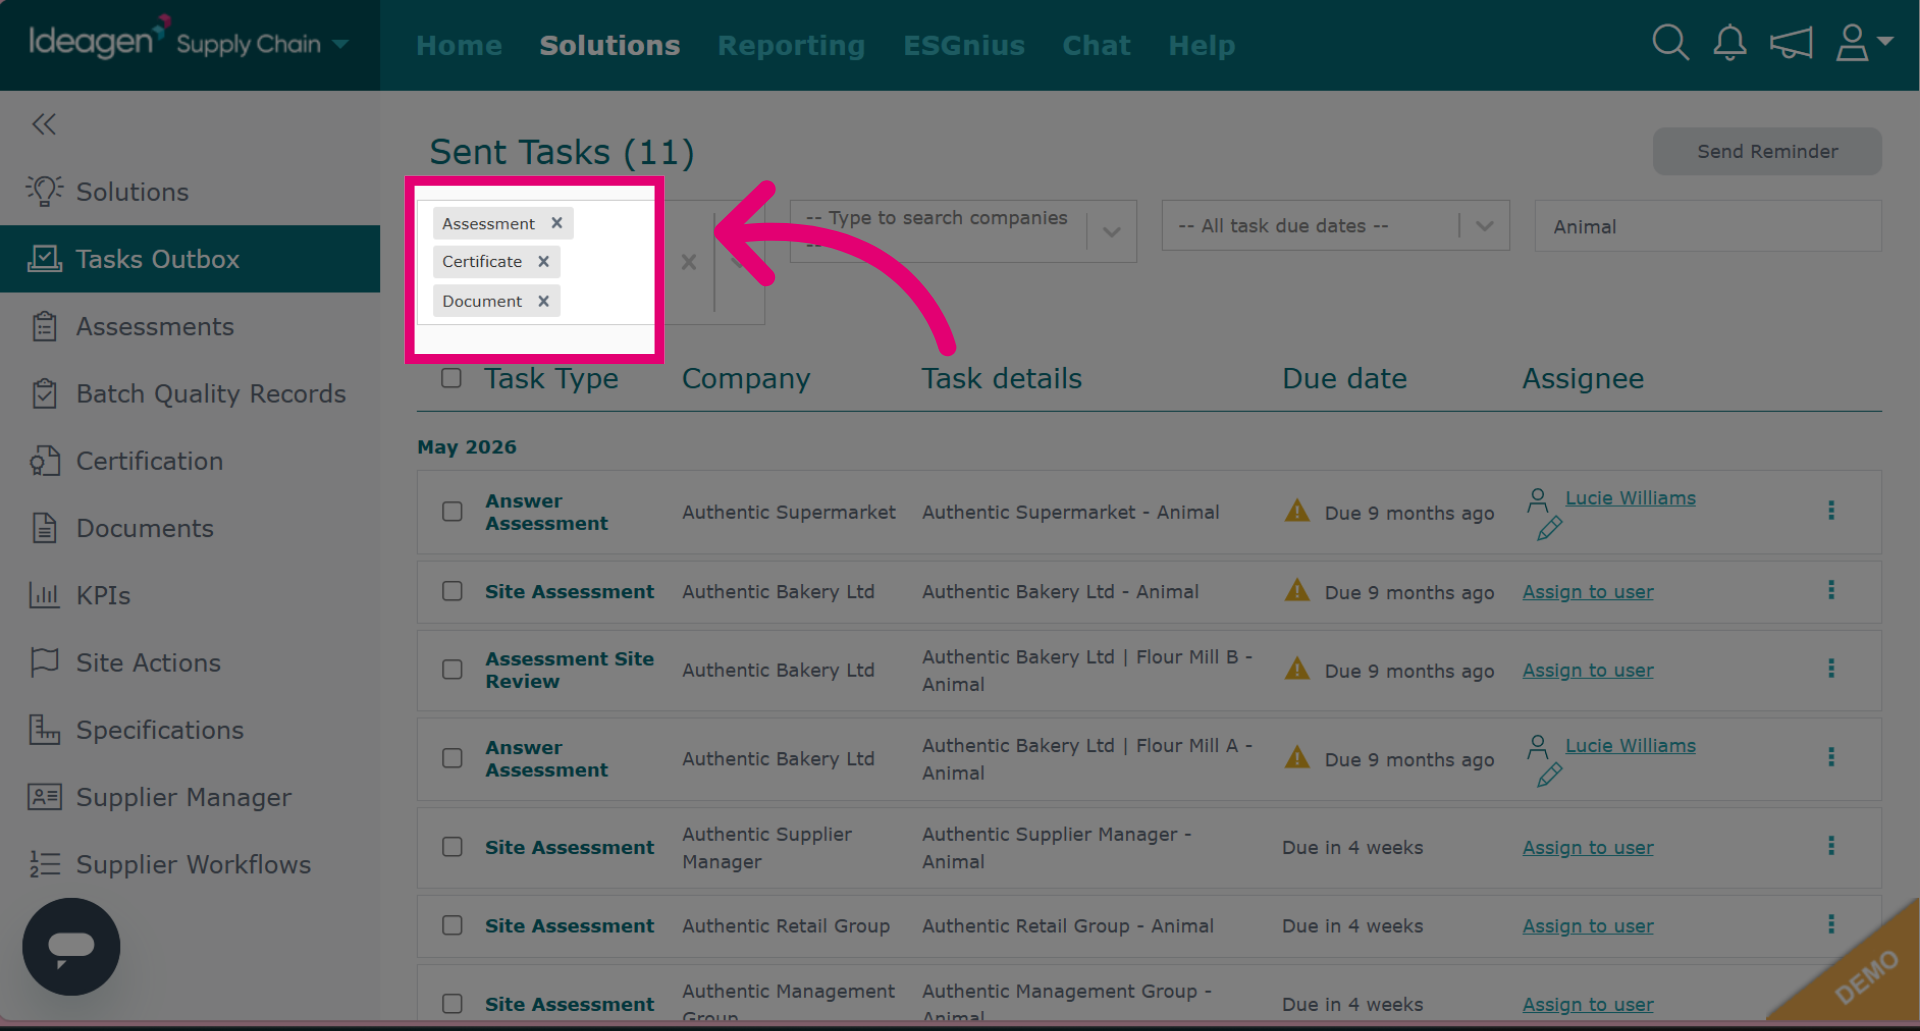
You can filter the task outbox in multiple ways. You can use just one of the four filters or a combination of all for each search. To filter by task type for example assessment, certificate, document etc, click the relevant option from the drop down to choose the filter. You can select multiple options in this filter, you are not limited to picking just one.
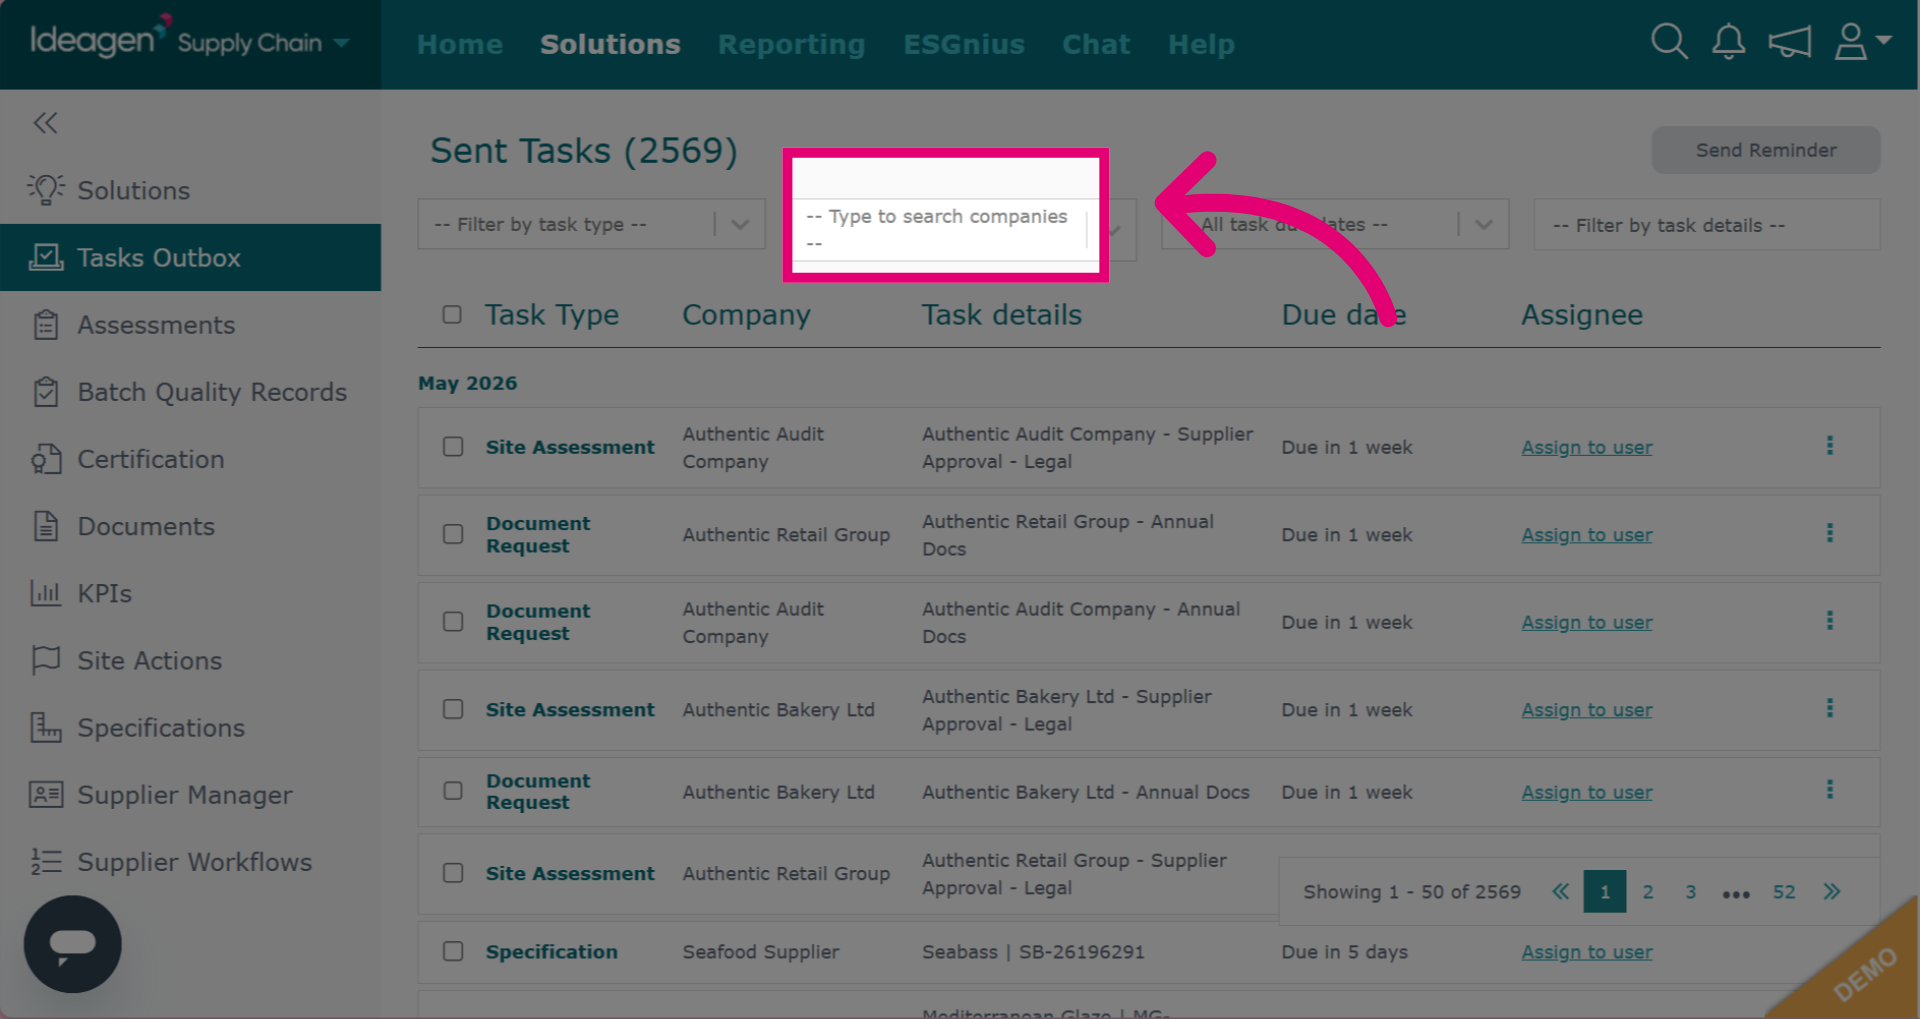
Or you can type in a supplier name and select it from the drop down, to filter by a specific company. You can only select one company at a time with this filter.
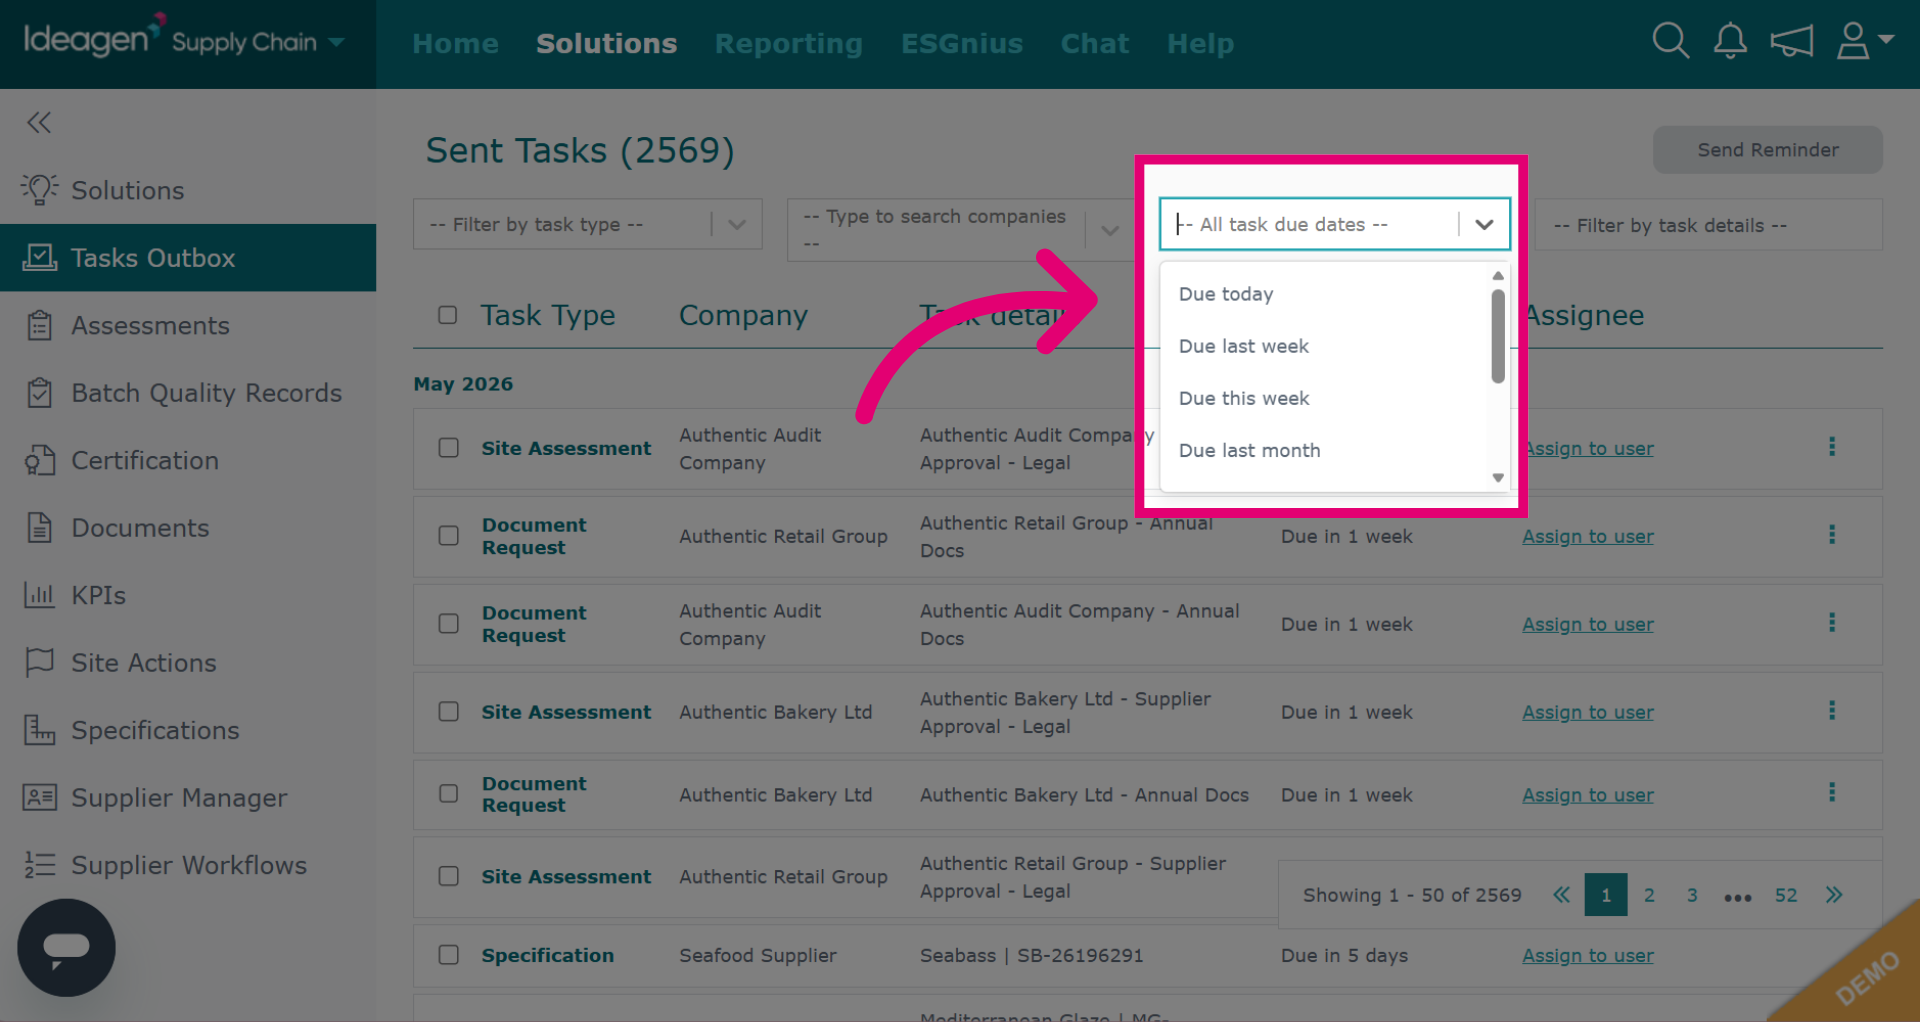
You can also filter by due date, by selecting a date range from the drop down options. You can only pick one option at a time with this filter.
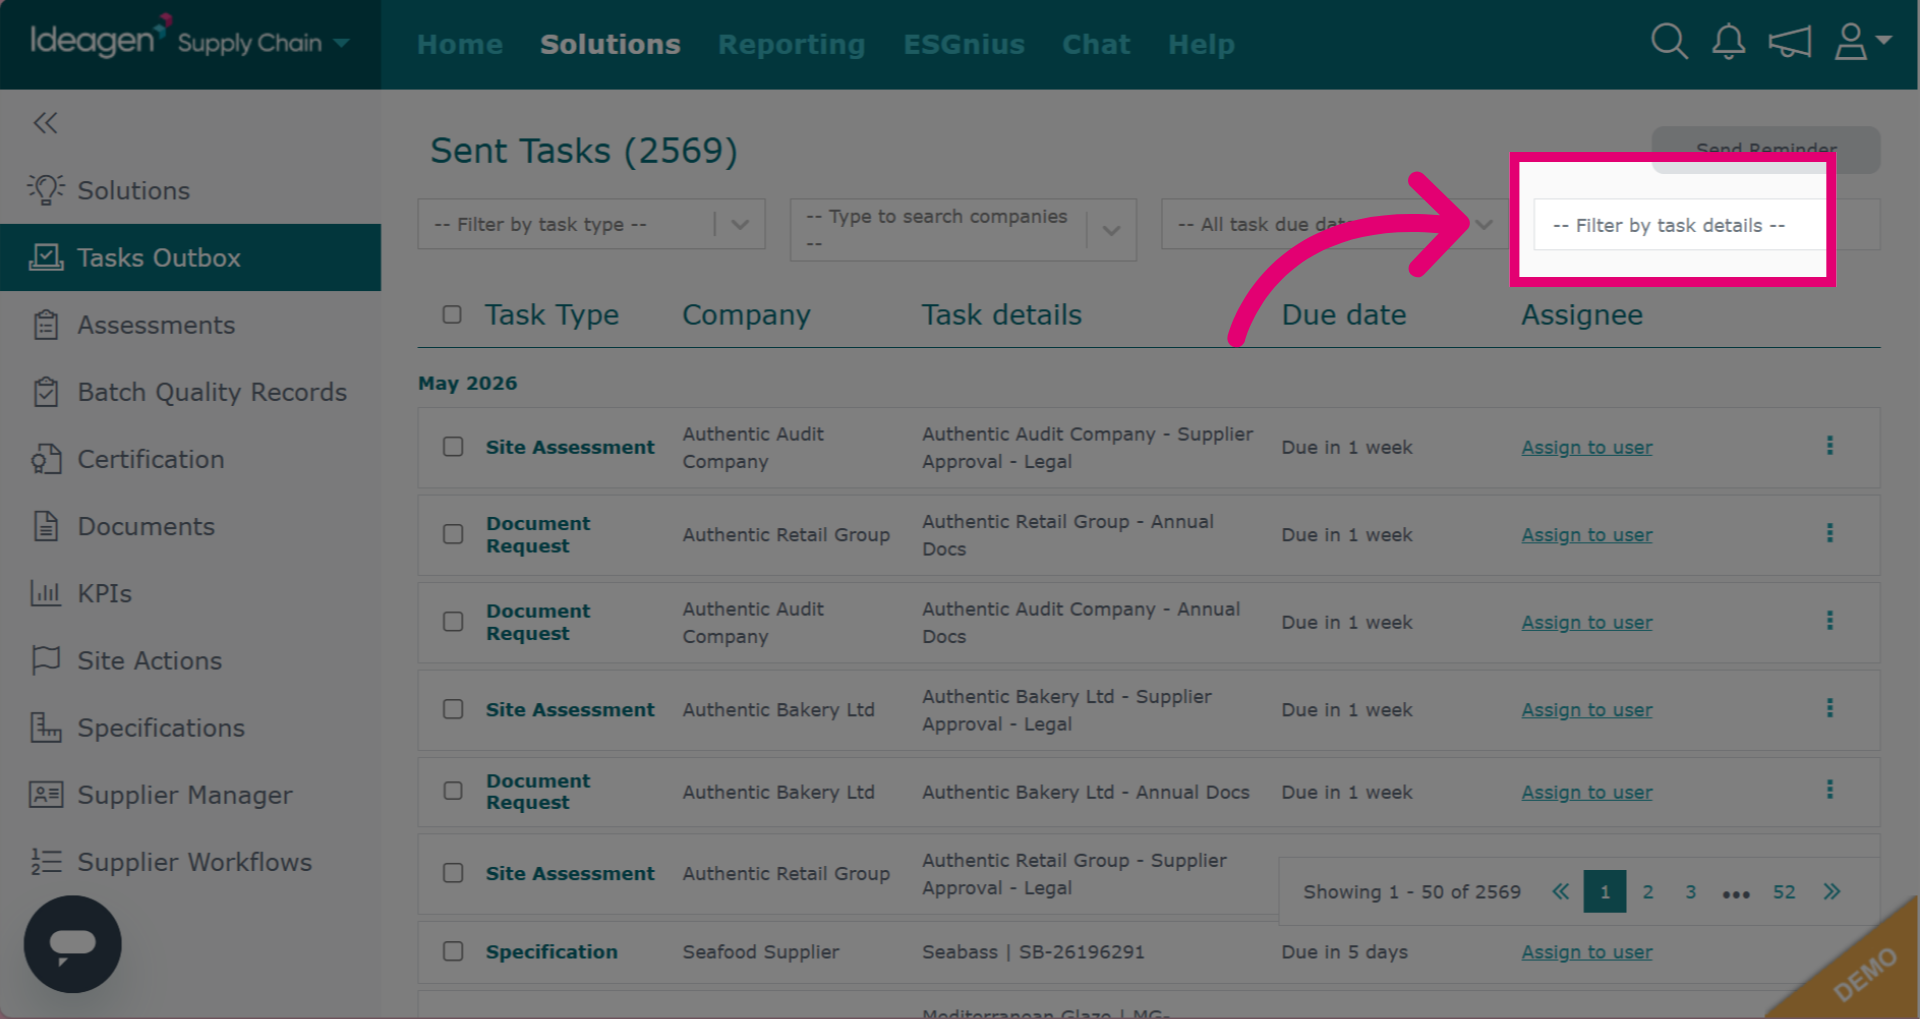
If you are looking for a specific task, you can search for it by keyword. For example if you are looking for all tasks you have sent out with 'animal welfare' in the title, you could search this term here.
To remove a filter, click the 'x' for selected options and clear any input text for free text options.
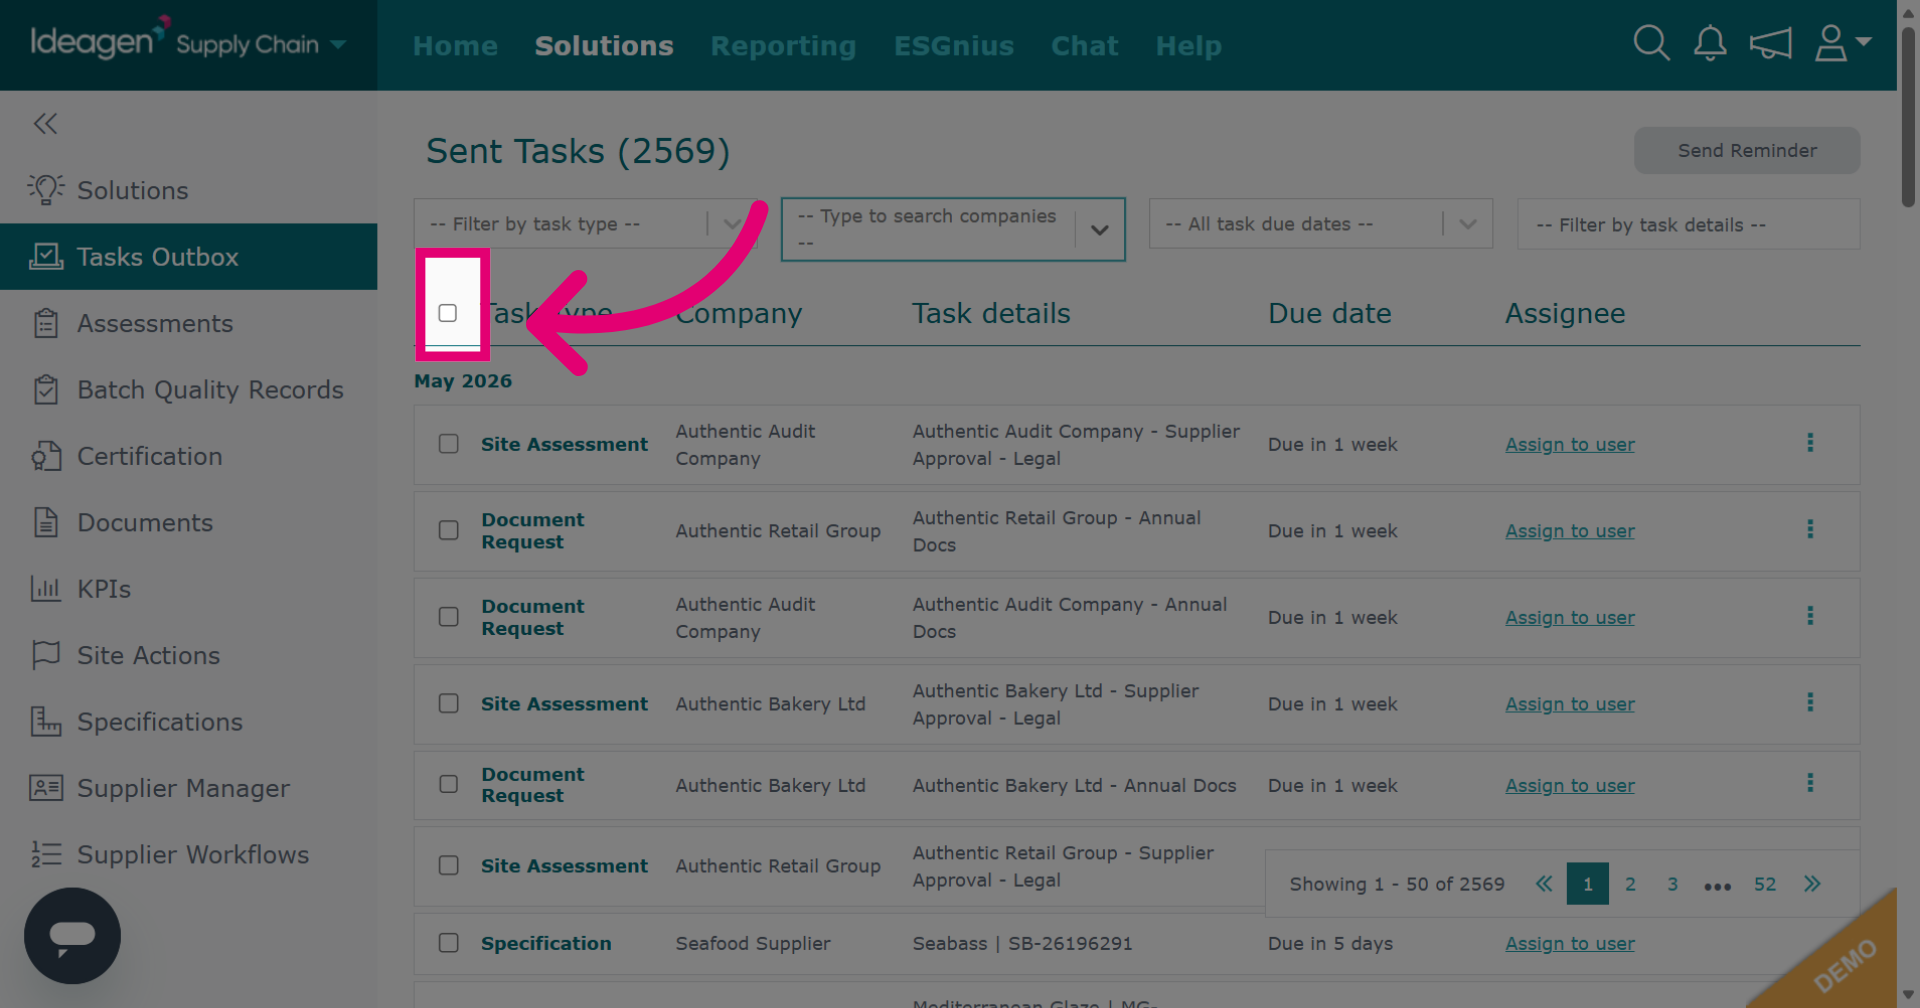
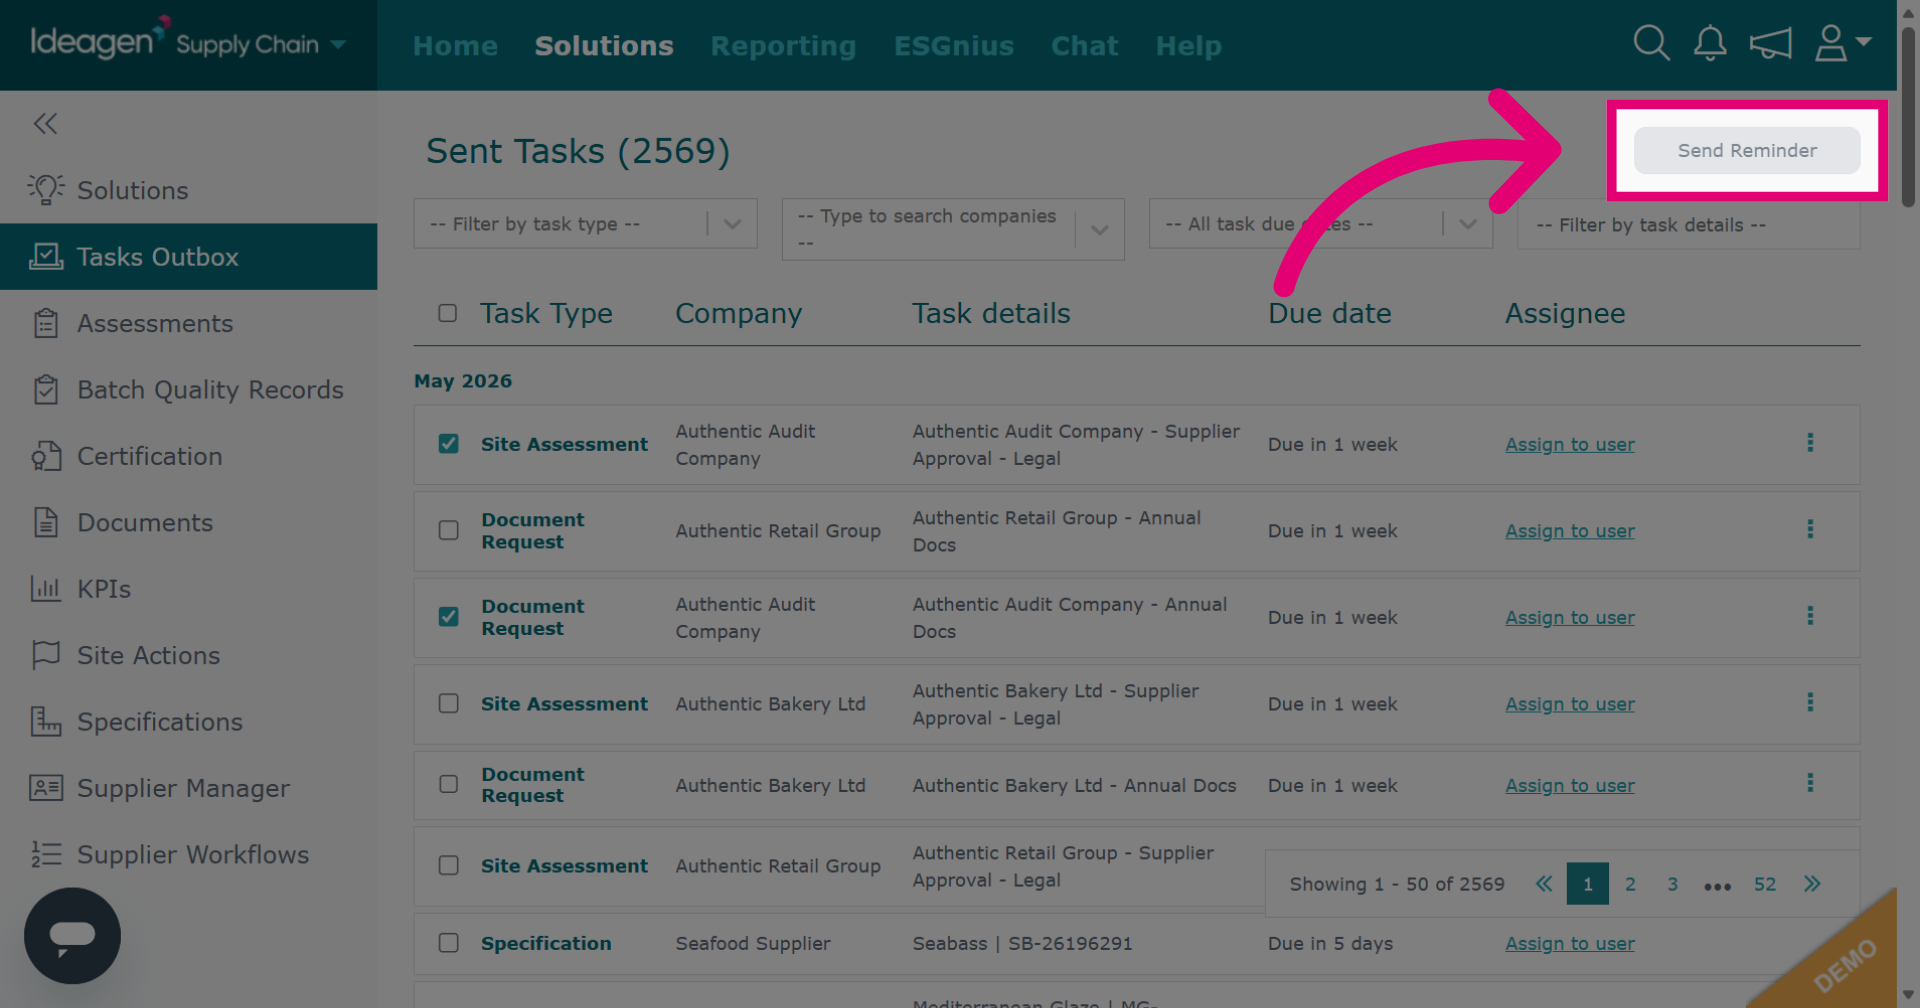
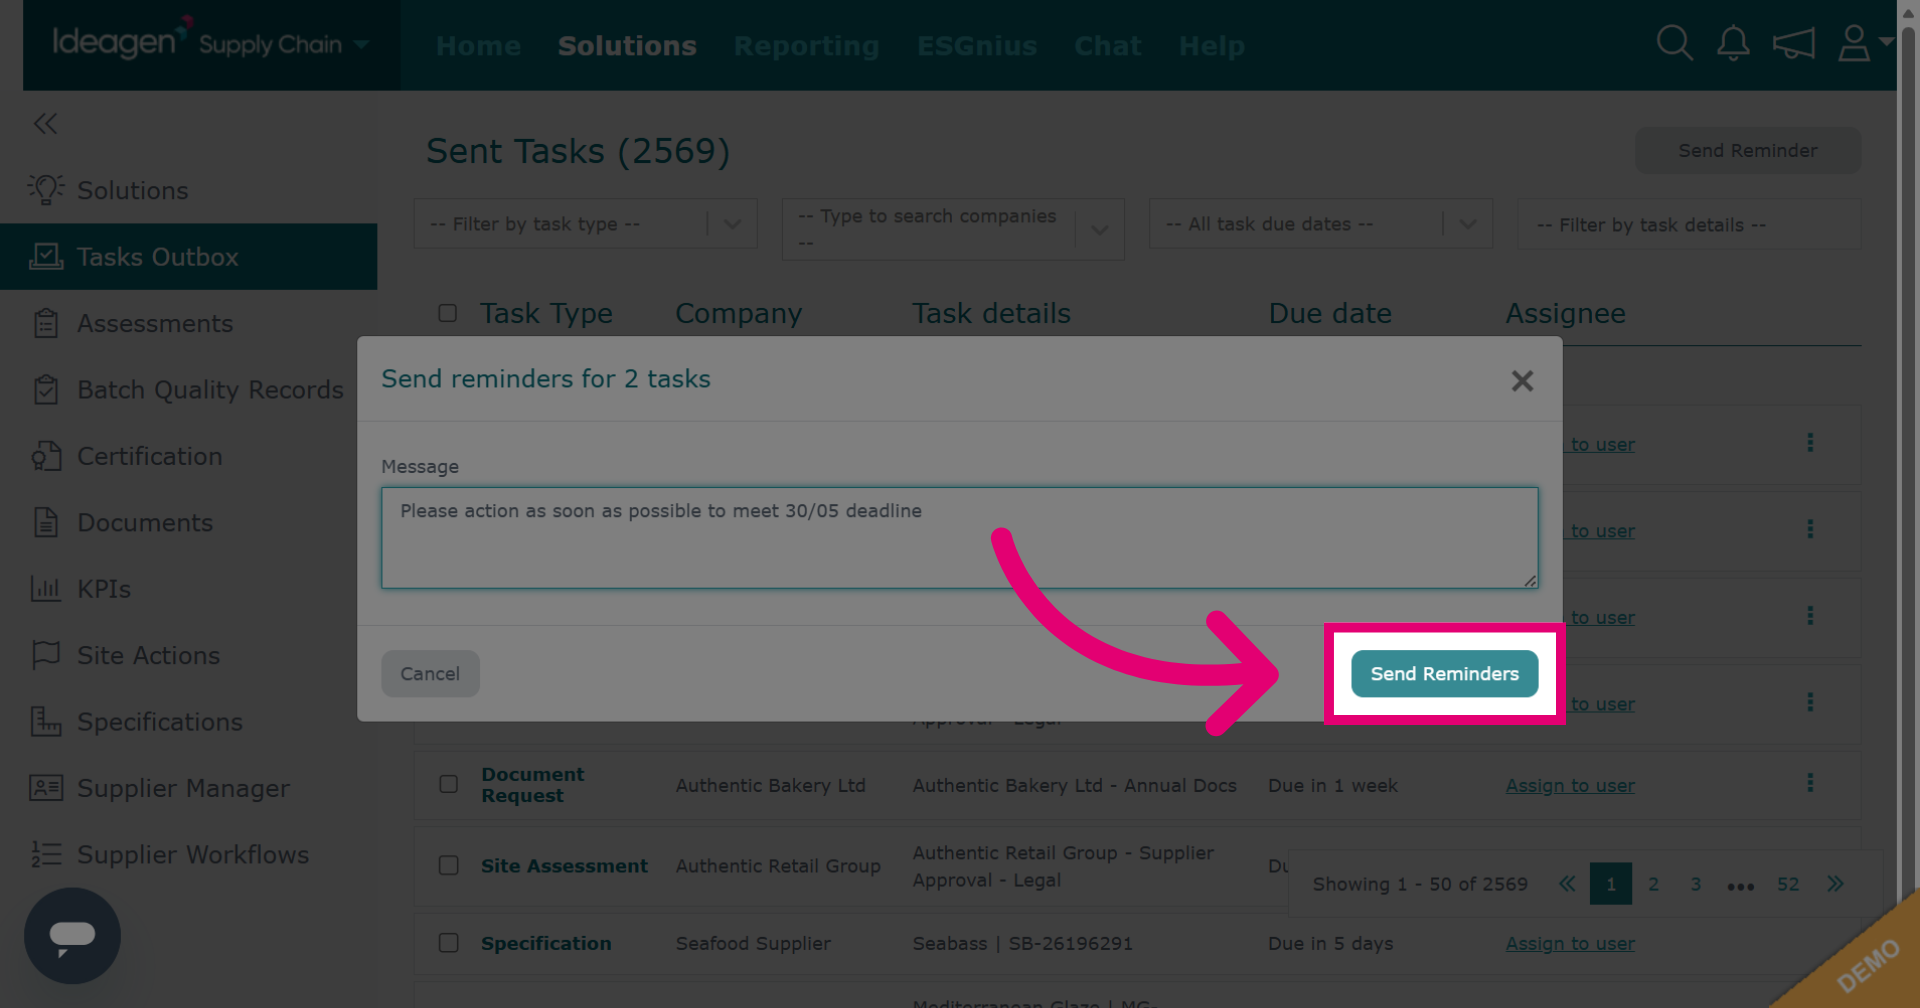
To send task reminders, tick the tasks you want to send a reminder for.

To tick all tasks on the page, tick the checkbox.
Click Send Reminder to notify users about selected tasks.
Input the message you want to send to accompany the reminder. You can leave blank if desired.
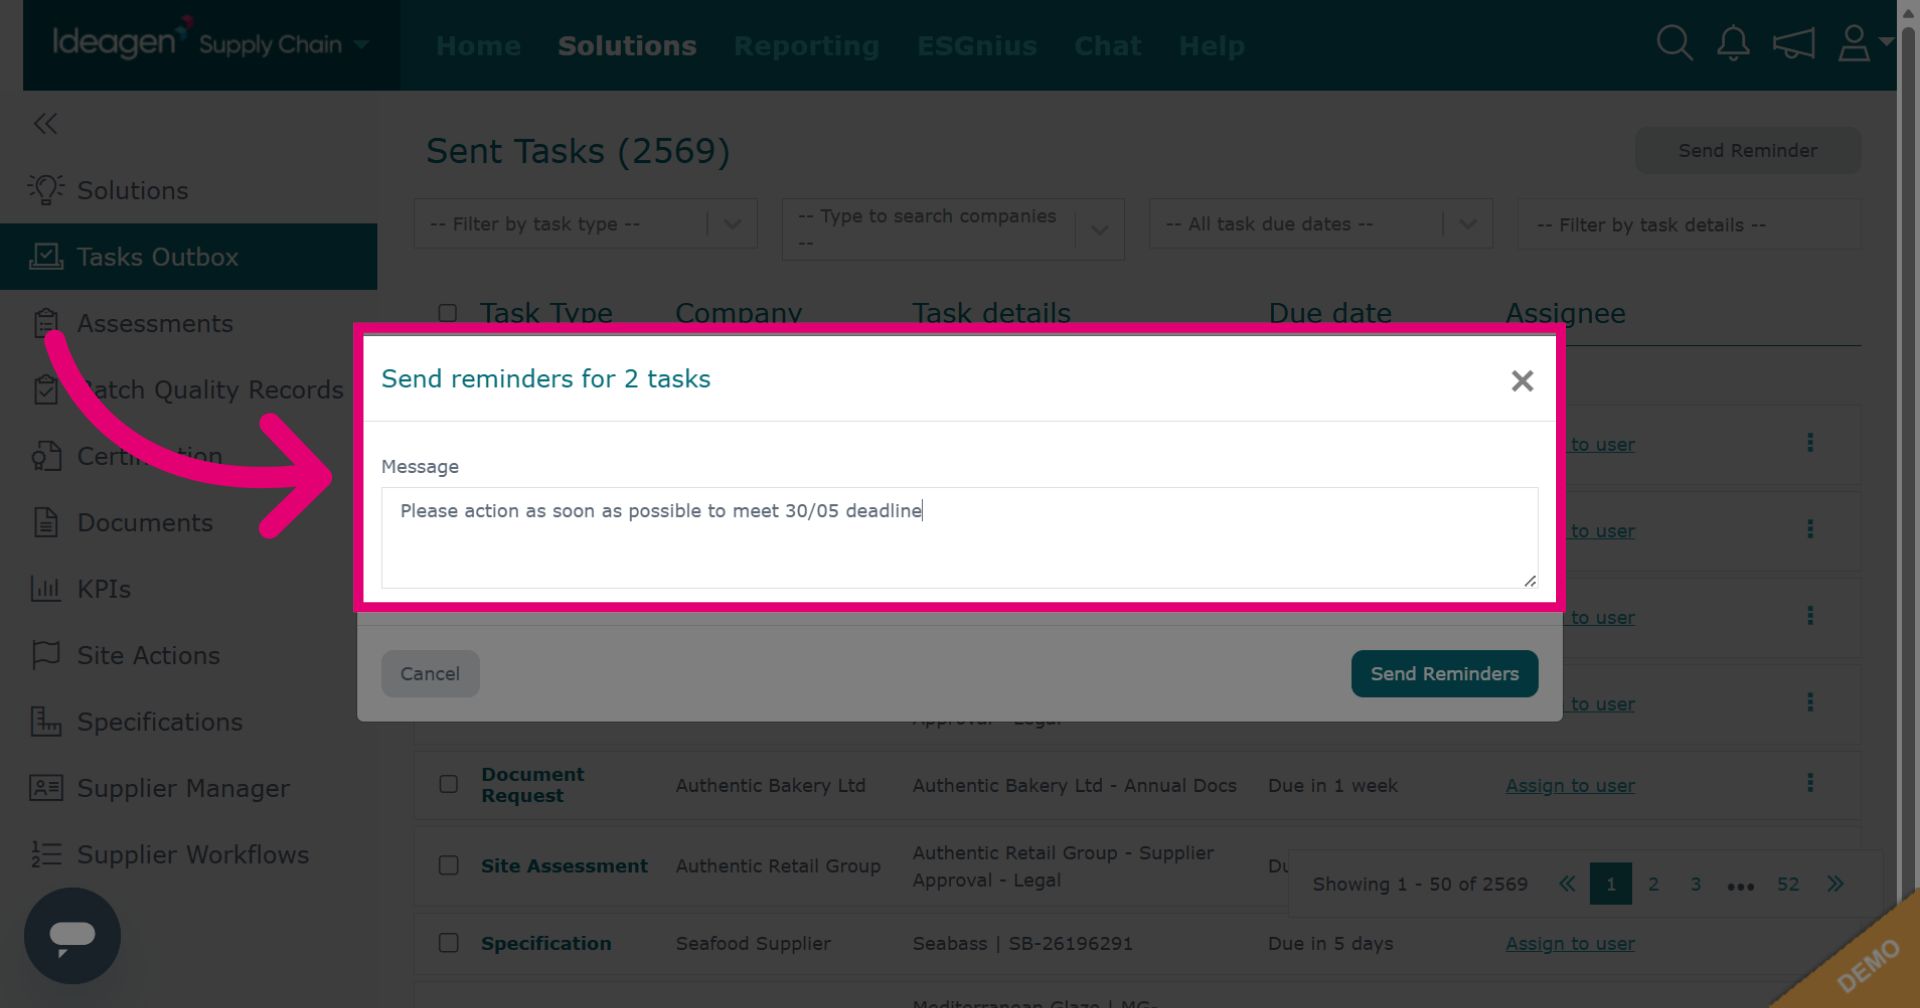
Click Send Reminders to dispatch the selected notifications.
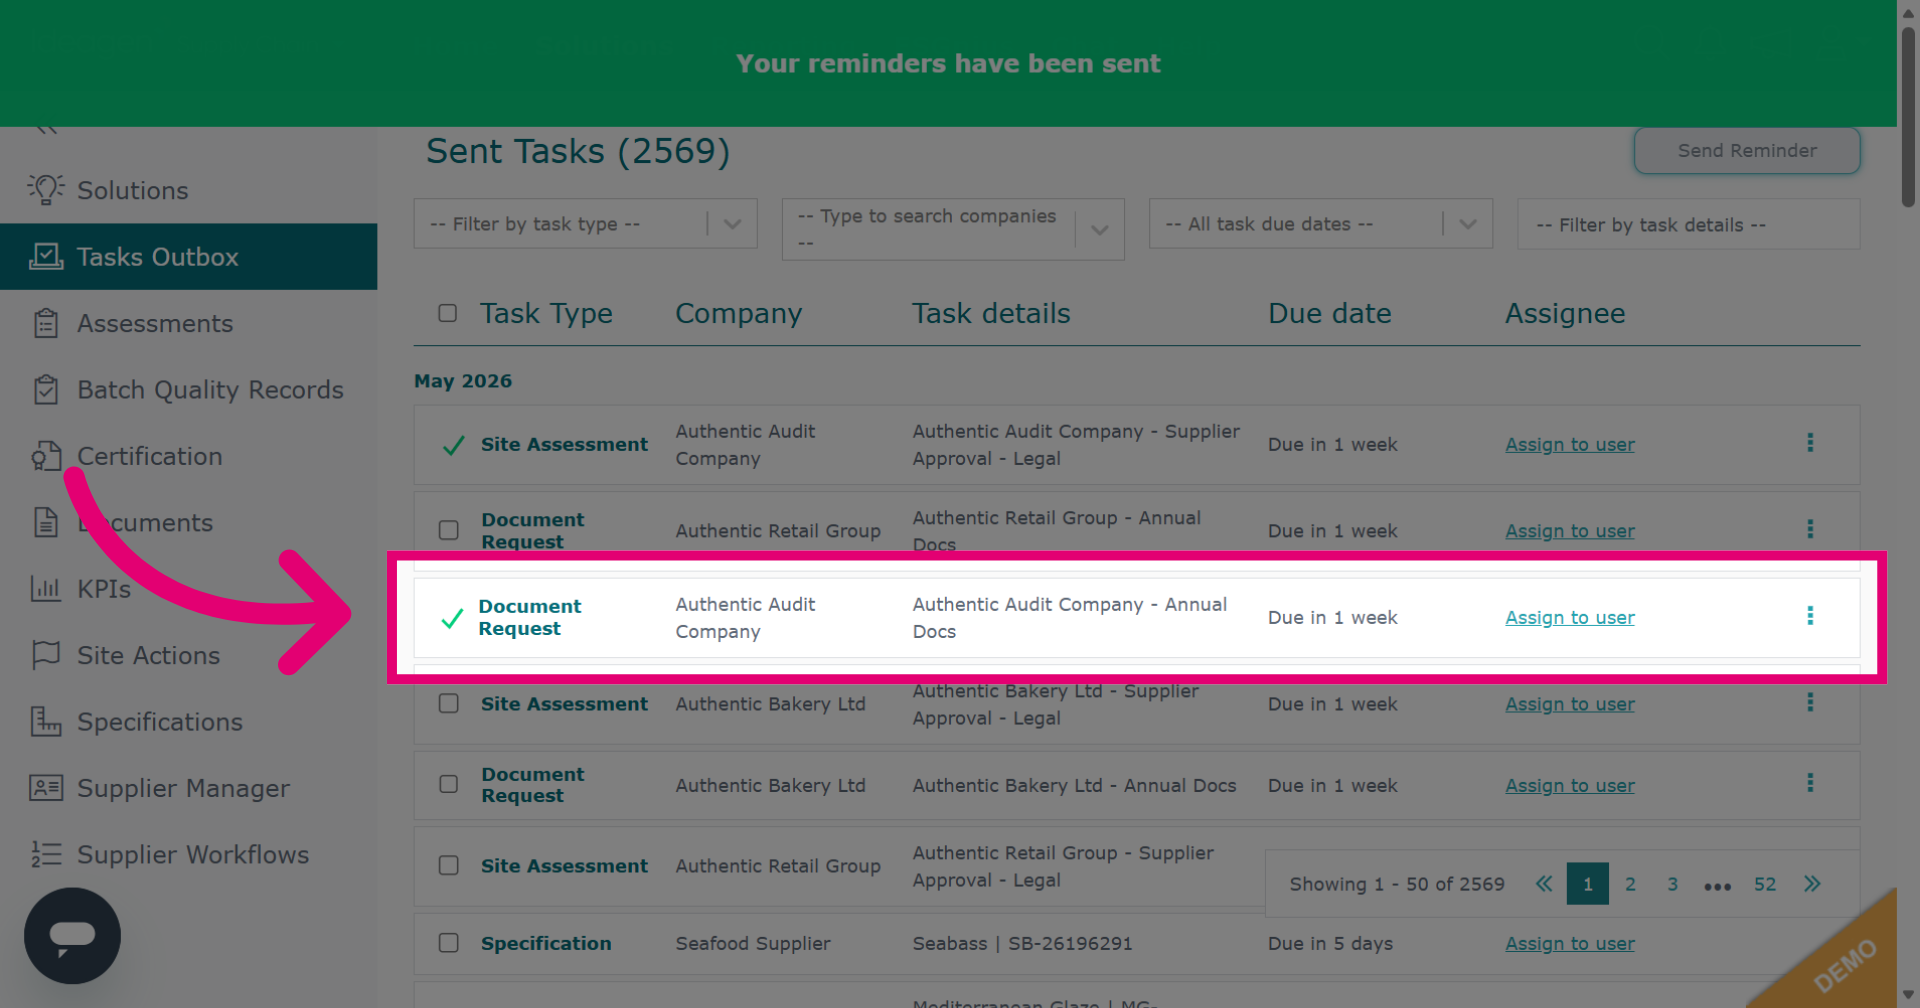
Once a reminder has been sent, it will show in the task outbox with a green tick next to the task. You will not be able to send another reminder for this task for 48 hours.
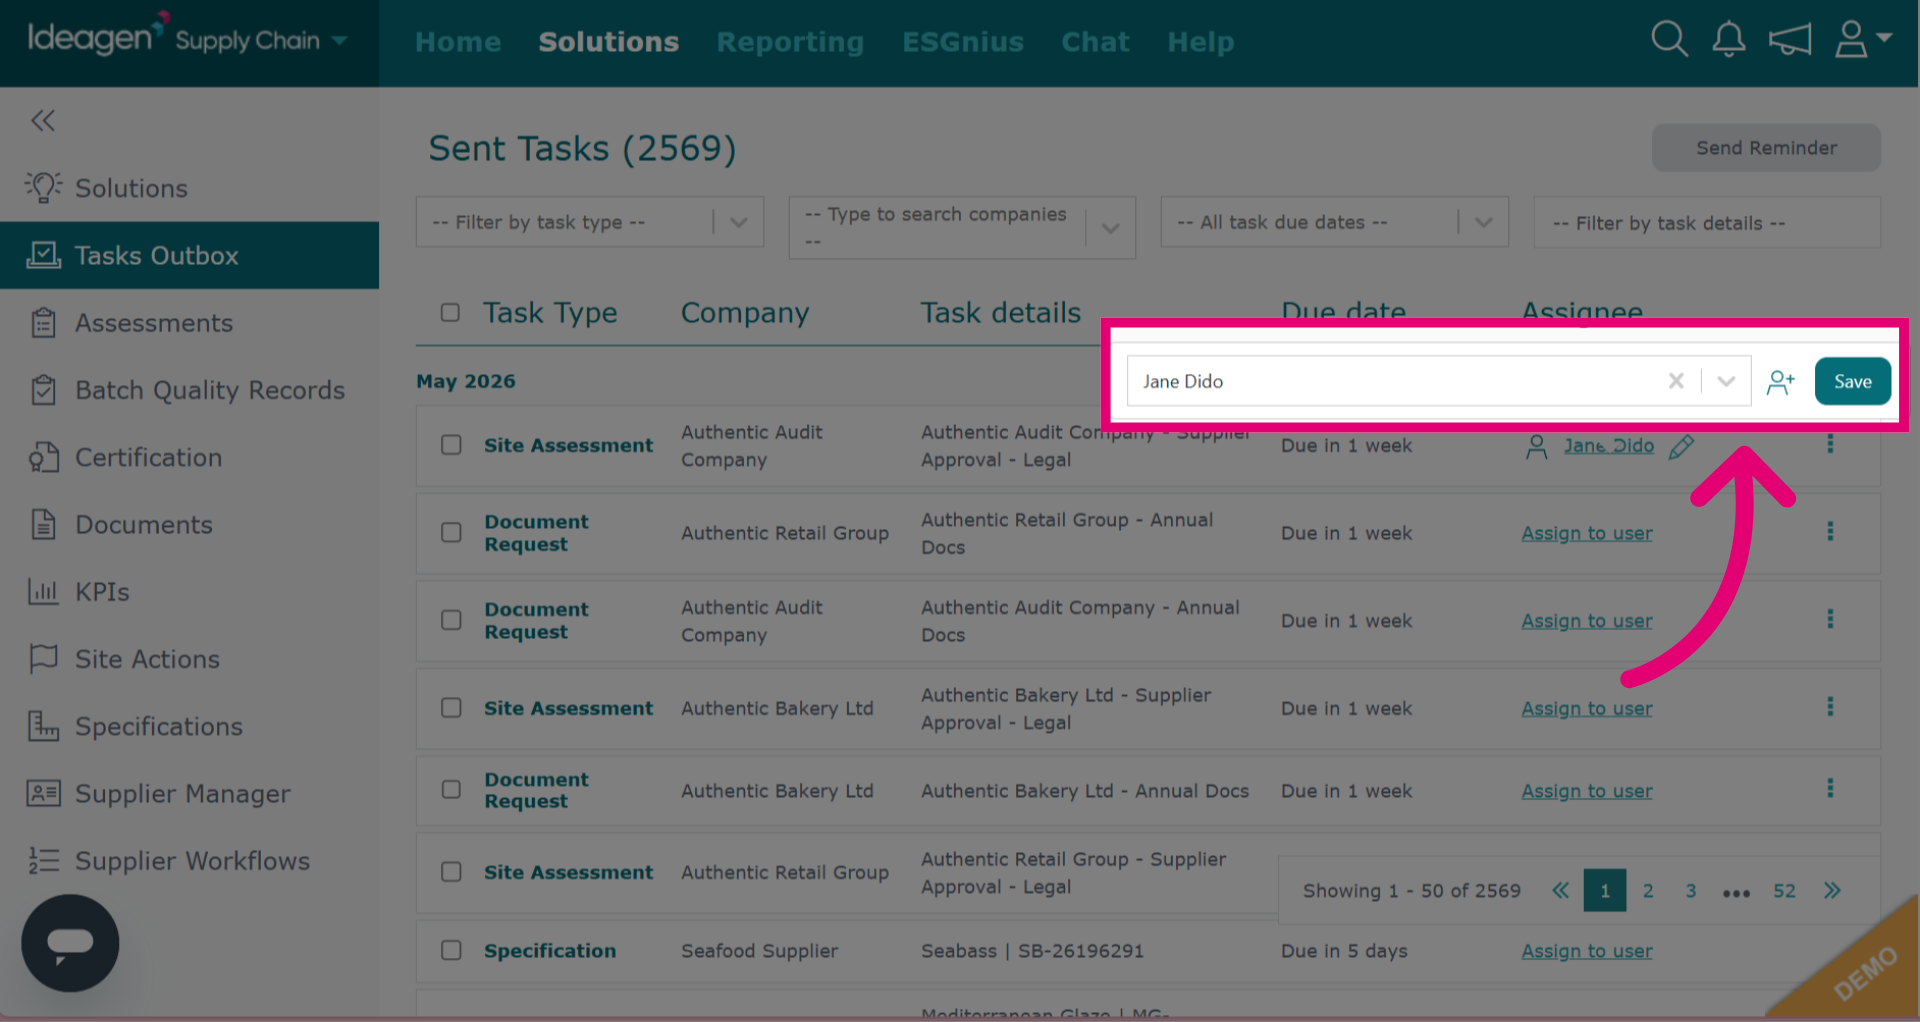
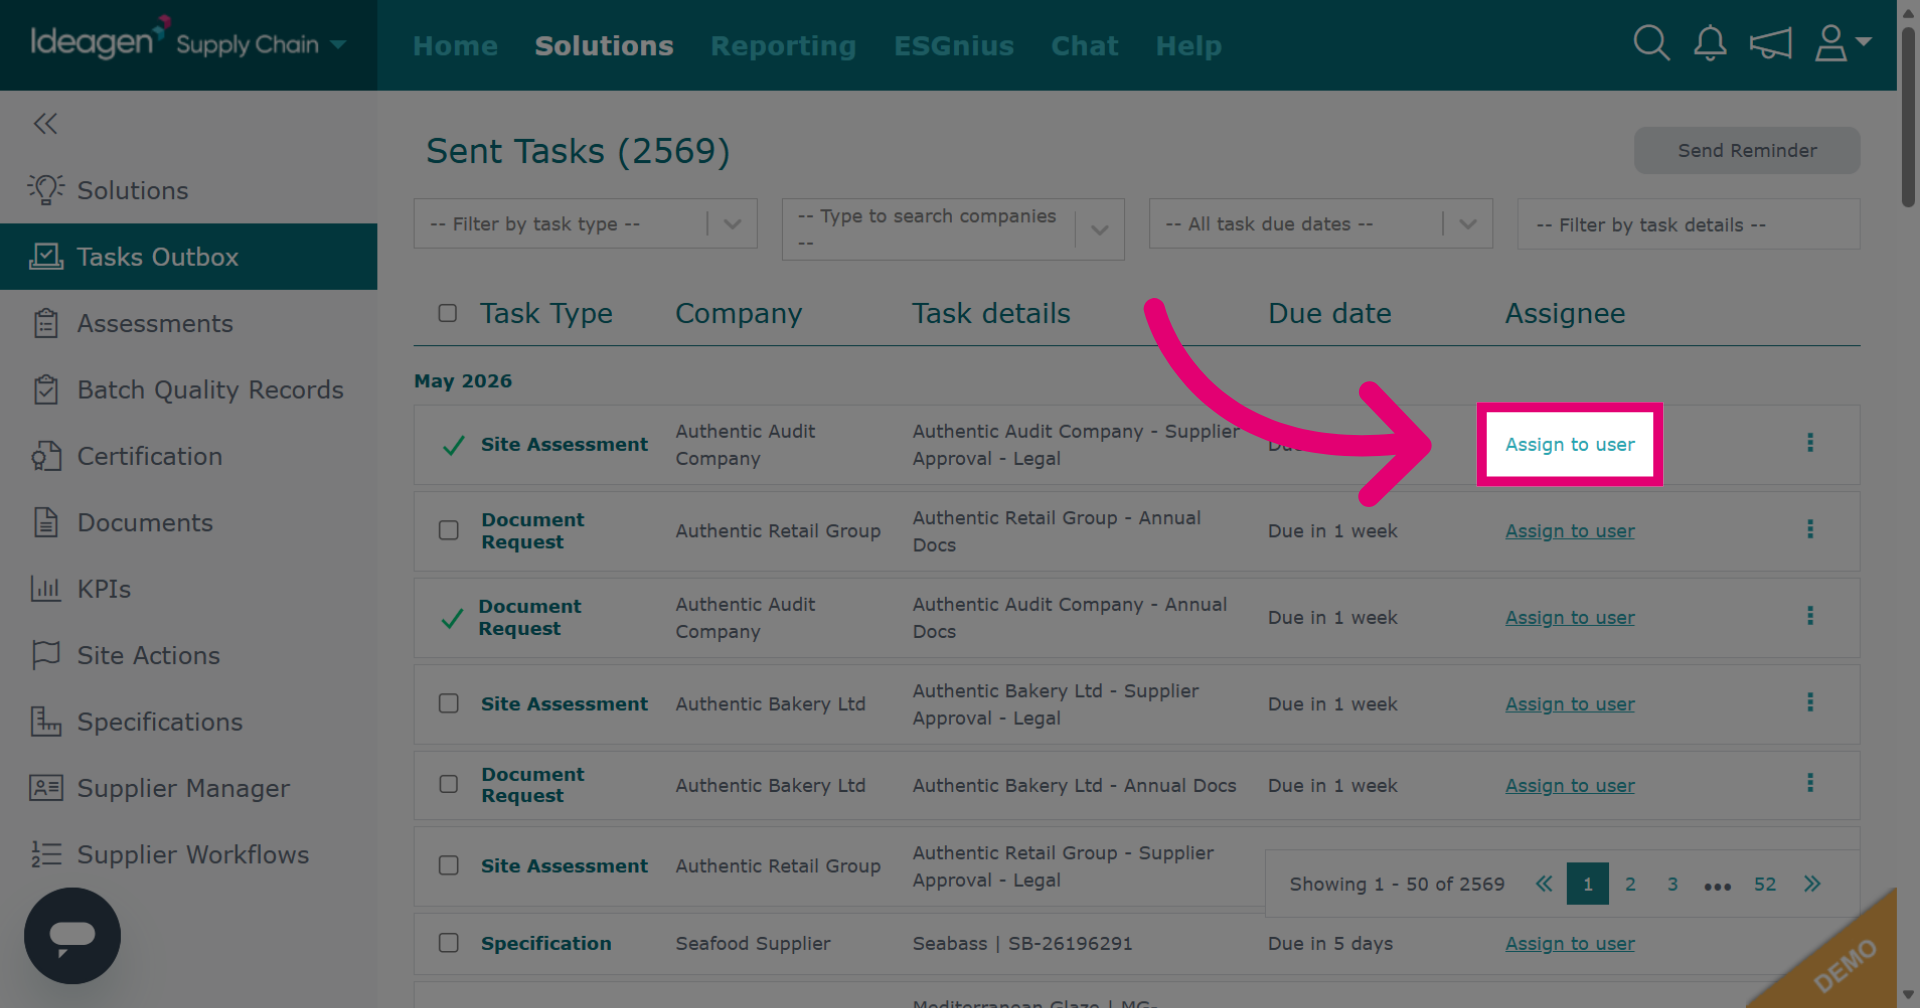
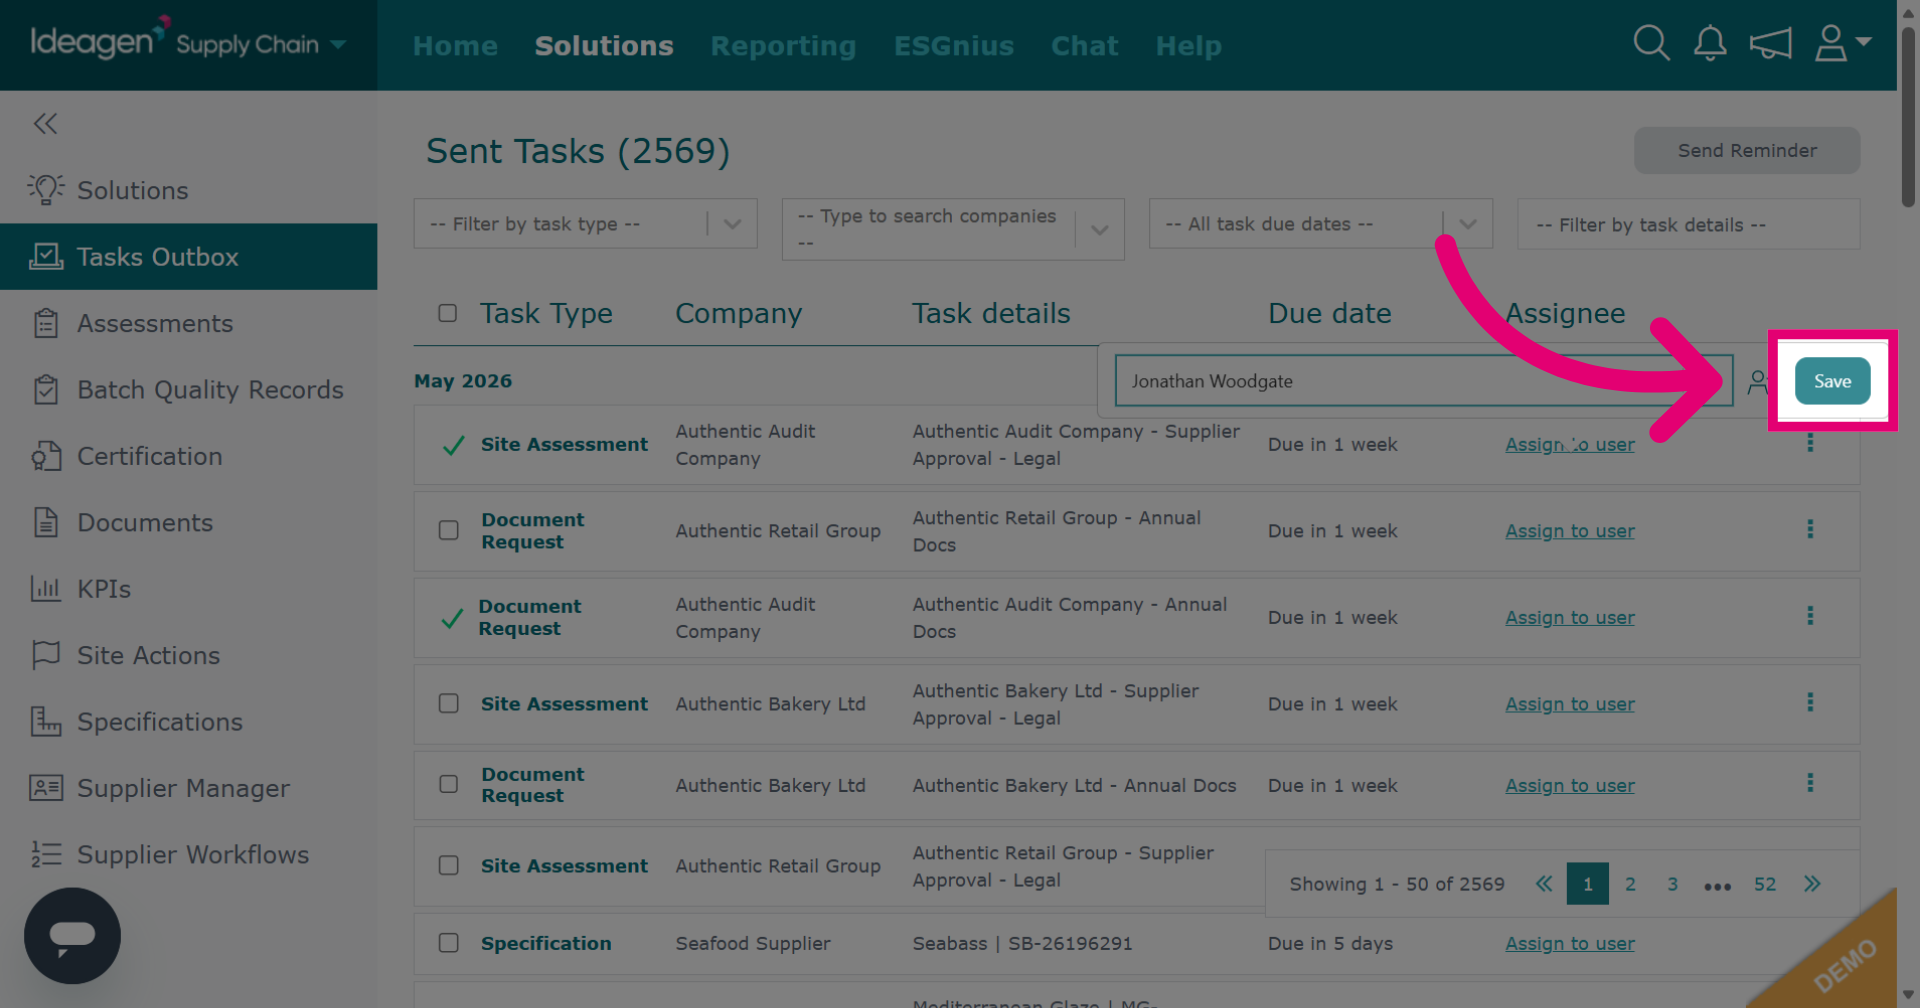
Click Assign to user to allocate the task to a specific user.
Select the user from the drop down options.
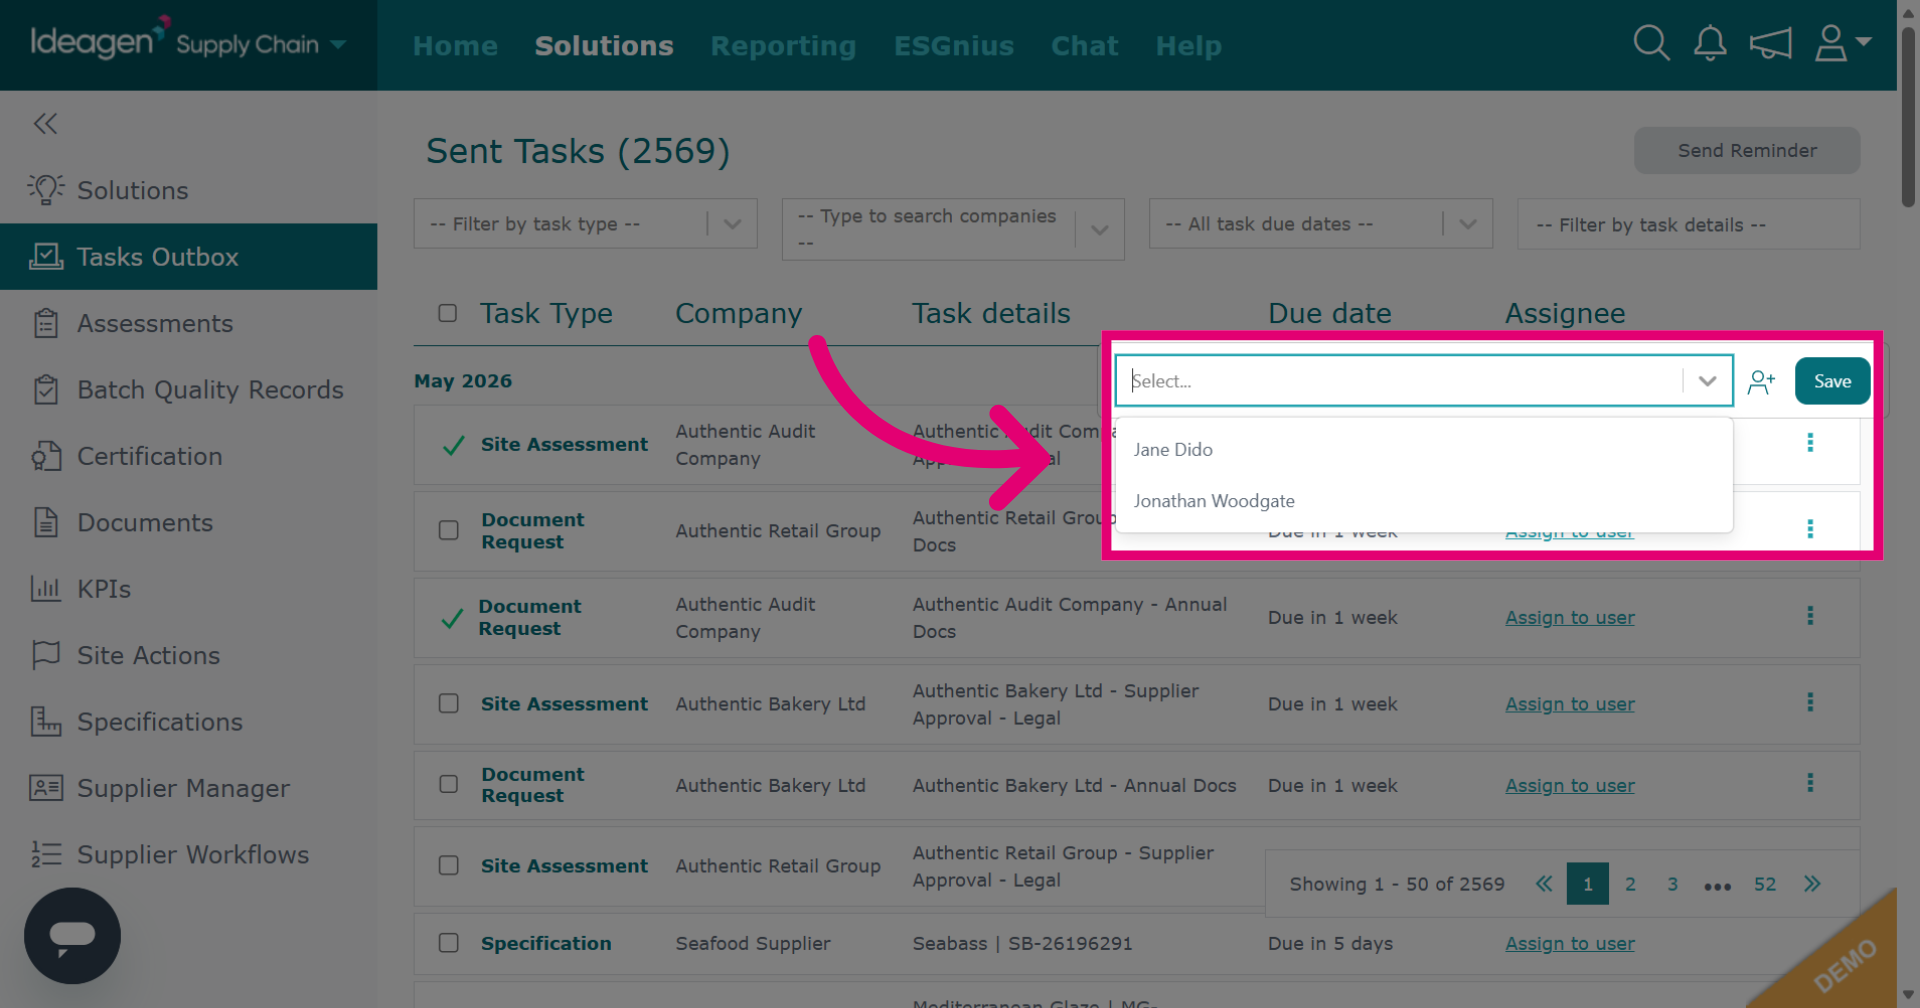
Click Save to confirm the task assignment.
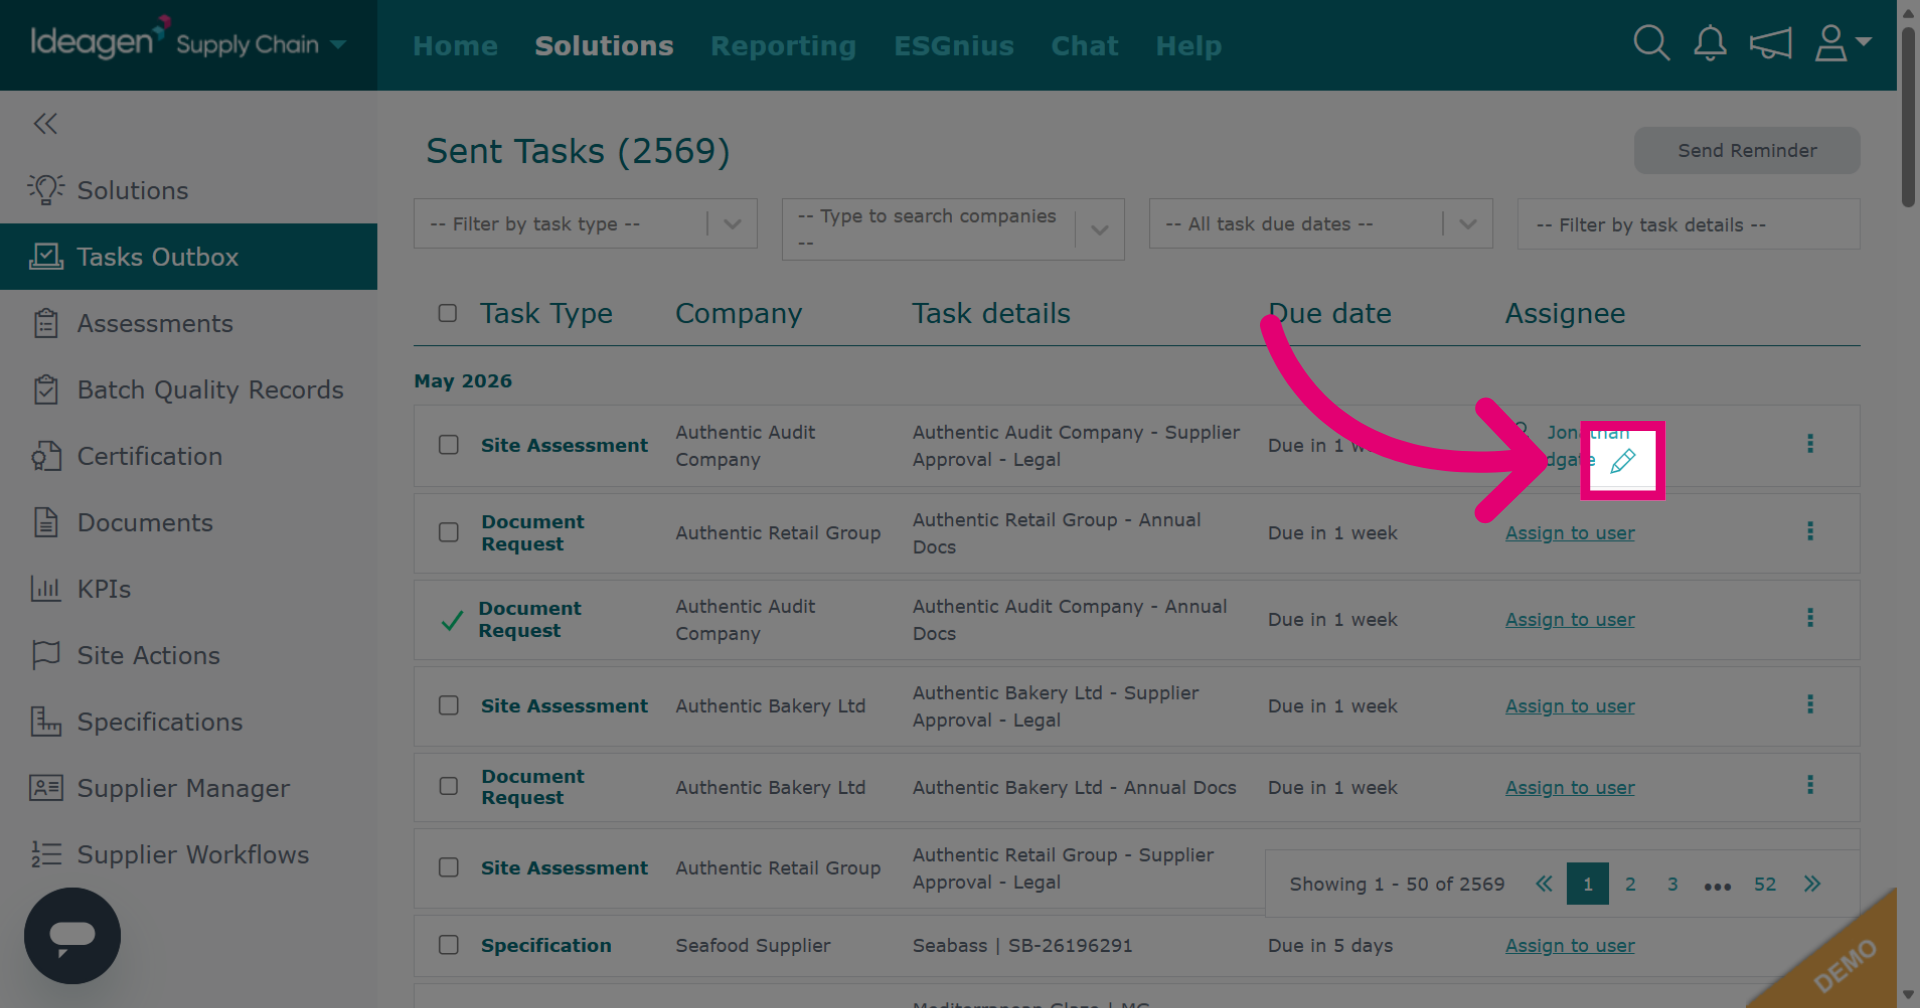
To edit an assignee, click the pencil icon next to the user's name. You will then be able to select a new assignee from the drop down options.
Click Save to apply the changes.

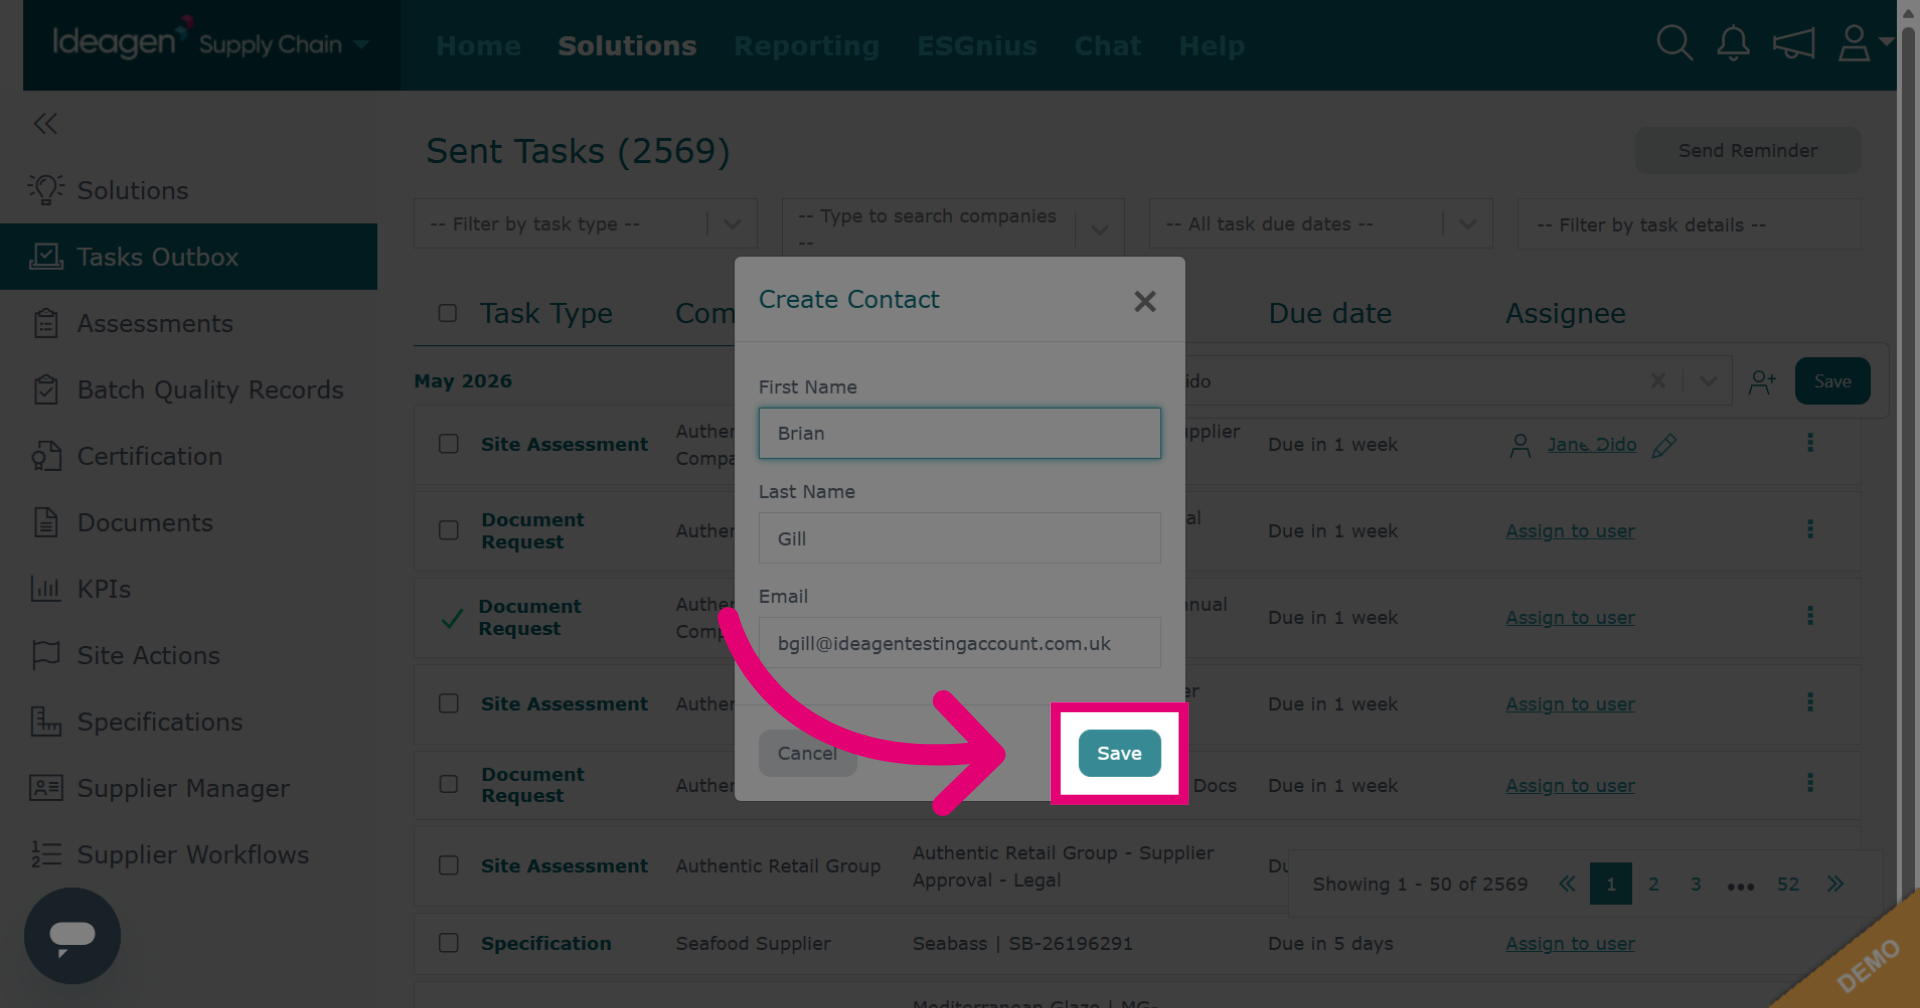
If the assignee you want to add is not in the drop down, you can add them by clicking the person icon.

Add the new assignee's details.

Click Save to confirm the added user. You will now be able to select them from the drop down assignee options.
To remove an assignee, click the 'x' besides their name and then click save.